
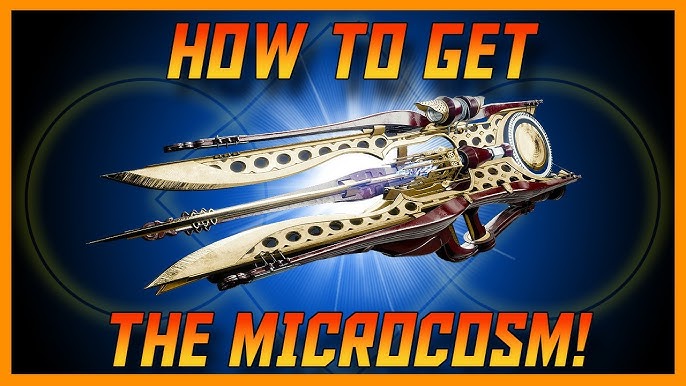
Discover everything you need to know about obtaining Microcosm in Destiny 2, including the prerequisites to complete it.
Microcosm is unique in Destiny 2 as it’s the only heavy weapon that can shatter enemies on a battlefield. Acquiring this weapon requires you to complete several missions before completing the Convalescence: Budding. You need to complete the Final Shape’s campaign, Destined Heroes quest up to Queens Part I adventure, and all four Convalescence quests from Micah-10. Micah will give you the exotic quest after doing the “Lost Ghost.” The quest itself is for the 2005 Power Fireteam campaign missions. Microcosm itself is the powerful weapon that comes with two distinct perks that enhance its damage and stats. In this guide, we’ll discuss how to obtain Microcosm in Destiny 2 and the perks of this unique weapon.
Also read out related guides
Destiny 2 Sundered Doctrine Dungeon Guide 2025
Destiny 2 Trials of Osiris Guide 2025
How To Get New Exotic Armor in Destiny 2
Get Strange Coins in Destiny 2
📝 Note: Want to skip the grind? Buy Microcosm in Destiny 2 and unlock the only heavy weapon that shatters enemies on impact. Get it fast, safe, and hassle-free with Immortalboost’s expert boosting service.
How to Get Microcosm
Complete the Convalescence: Budding is the first step of unlocking the Microcosm in Destiny 2. This is an Exotic quest given by Micah-10 after completing the Final Shape campaign. It means that you need to complete the series of Convalescence quests from Micah-10.
- Complete the Final Shape campaign
- Start the Destined Heroes quest and finish Queens, Part 1
- Complete Convalescence: Rootbound
- Complete Convalescence: Underbrush
- Complete Convalescence: Greenery
- Complete Convalescence: Budding
First up, you need to have finished the Final Shape campaign and have the Destined Heroes quest. After that, you need to complete the first part of this quest, which is the Queen’s part 1 mission. After completing this mission, you get access to Micah-10 conduit, who gives you a quest for unlocking the rest of the Pale Heart weapons. Now, to get the Microcosm quest, you need to complete the quest for the shotgun, machine gun, and sniper rifle first.
After completing these quests, Micah will give you the Exotic quest for Microcosm called Convalescence Budding. This quest tasks you with completing three campaign missions on cooperative focus mode. This is the new difficulty mode that you can see in the Pale Heart destination next to where you would go to replay campaign missions.

Mission Power and Modifiers
These missions are at 2005 power. It also requires a fire team, either a team of two or three, as you cannot do this solo. Here are the modifiers you can expect in these missions.
- Cooperative Focused Campaign- Heavily shielded and highly aggressive combatants that appear more frequently and in great numbers.
- Synergy- Fireteam communication and coordination are crucial for success.
- Radar- This is Disabled.
- Galvanized- Combatants have increased health.
- Restricted- Fireteam revives are limited in restricted zones.
- Balance Scales- This activity does not scale combatant difficulty according to fireteam size.
These cooperative focus missions also have new mechanics.
Ascent
This mission starts out the same as the base campaign mission. Just progress forward until you reach the first combat room. Clear out the enemies and then head to the left, and you will find more enemies, including some subjugators. Once they’re gone, you will see the taken blind needed to progress is trapped inside a darkness shield. A Berserker like one from Scourge of the Past will spawn in. Now, to deal damage to them, you need to do the exact same mechanics as back then. Shoot him from the front and the back at the same time.
This is why you literally need a teammate. After that, he pops his bubble, and then you can kill him. Once he’s dead, though, look up in the air and you will see a pyramid structure that you can shoot. 2 Pyramid shards must be shot at the same time. We suggest you look at the direction of that resonant light to find the second pyramid structure. Make sure your team is ready, so that when you shoot the first one, they can then immediately shoot the second one. If you mess up, you will have to kill the Berserker again.
- Deal with the Berserker
- Locate the Pyramid Shards
- Shoot them at the same time
- After successfully doing this, the shield will disappear, and you can pick up the taken blind needed to progress, and some enemies will spawn in.
Continue progressing through the mission up the mountains. At this point, someone on your fireteam will give the Fractured by Witness debuff. You need to pass this debuff on from one teammate to another. It must be passed around x7. The Glyphtouhed works a bit differently. Instead of everybody getting the buff and being able to see the symbols that drop, only one person on your fire team will get the buff. The person will Glyphtouched can’t see the symbols.
Dissent
This mission is where you’re searching for Zavala and essentially asking the veil statues for directions throughout. As for the first part of the mission, there’s nothing new besides the increased difficulty and the fracture mechanic from before. You need to coordinate with the teammates and pass the fracture debuff. The first few encounters in this mission are also in relatively small enclosed statue rooms or outside in the witness storm. You will eventually come to an area with two floors, both having a Pyramid Shard on a wall concealed behind an orange barrier. Once you defeat all the enemies, a Berserker will spawn on the top floor. Shoot at him so that he can break his immunity, and you can kill them. Proceed with shooting the pyramid shards simultaneously. Keep an eye on that fracture debuff and don’t forget to pass it around to your teammates. Enter the temple room and eliminate three yellow bar wizards. Claim the chest at the end to complete this mission.
Iconoclasm
Throughout this entire mission, you do not have to deal with the Fracture debuff. This is because your fireteam will split up during the multiple encounters this time around. The mission starts out exactly the same as the standard version. You make your way through the quest as normal, killing the small groups of enemies on the way as you platform to the first main combat section. Here you have tons of wizards, taken, a prismatic shield in enemies, and a tormentor. Tormentor will spawn after you’ve cleared a few enemies out. They can jump and slam attacks, as they can knock you off the edge to the right or left. Defeat the Berserker at a certain point in the mission and activate both Pyramid Shards. Below are all the steps required to complete the Iconoclasm in Destiny 2.
- Follow the path to get to the Fortress Gate.
- Battle the Imprint of Nezarec boss.
- Get through the gate into the Sacrarium area and bear right.
- Kill the Witness’s Blessed boss.
- Eliminate Dolgith, Blade of Reasoning.
- Fight against the Witness.
Completing this mission allows you to gain Microcosm, Khvostov, and Ergo Sum.
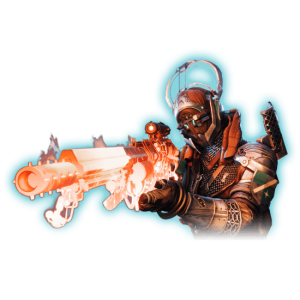
Microcosm perks
The Microcosm in Destiny 2 has two Exotic perks. The first one is Paracausal Beam, which fires a beam of Kinetic light, dealing bonus damage to shields. The second one is Paracausal Imbuement, which grants Super energy on kills and provides bonus damage after the Super expires. As far as an exotic catalyst goes, we don’t have a slot for it. This trace rifle sits at 1,000 rounds per minute, just like other trace rifles. Kinetic damage of this weapon contributes to both the light and darkness prismatic meters simultaneously.