Blizzard puts new things in their game that aren’t like the usual adventures or big battles. In Dragonflight, they added a special thing called Secrets of Azeroth. This was a fun activity that players could discover bit by bit over 15 days. Unlike other short-time events, Secrets of Azeroth will stay in the game for a long duration, so players can get its achievements whenever they want.
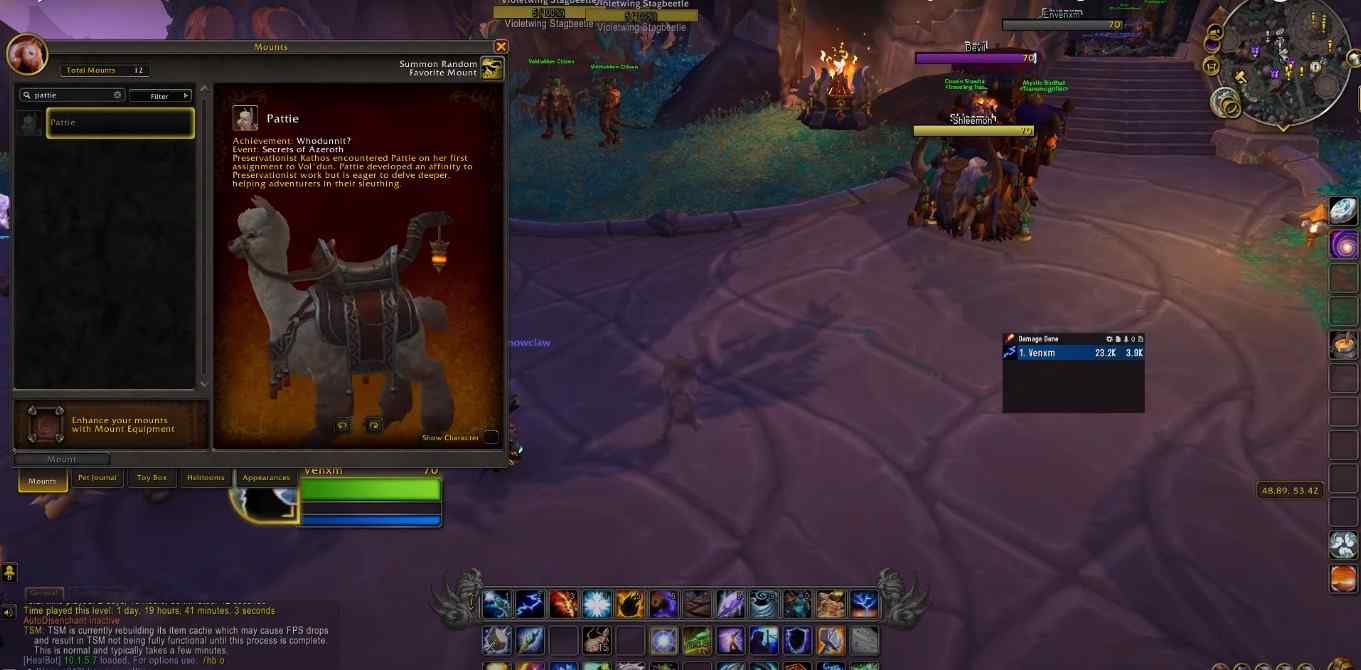
Remember, sometimes there will be more than one task to do at the same time. A single quest will have one mini-quest further that the players will complete. This guide will show How to Complete all 15 days of Azeroth Events and get the Pattie Llama mount at the final quest that will be on day 15 of the Azeroth Event.
Please note: This complete walkthrough is written by a professional WoW booster who is also working as a content writer plus booster for our company! If you need any help regarding boosting, make sure you try out our services.
Here’s the Guide on How to complete Azeroth Event in World of Warcraft
Complete Walkthrough of Secrets of Azeroth Quest Start to End
Starting the quest is easy as long you have a character that can get to Valdrakken. Go ahead and teleport to Valdrakken or if you are already there then into the Inn inside of Valdrakken and speak to preservationist Kathos, who will start the quest line.
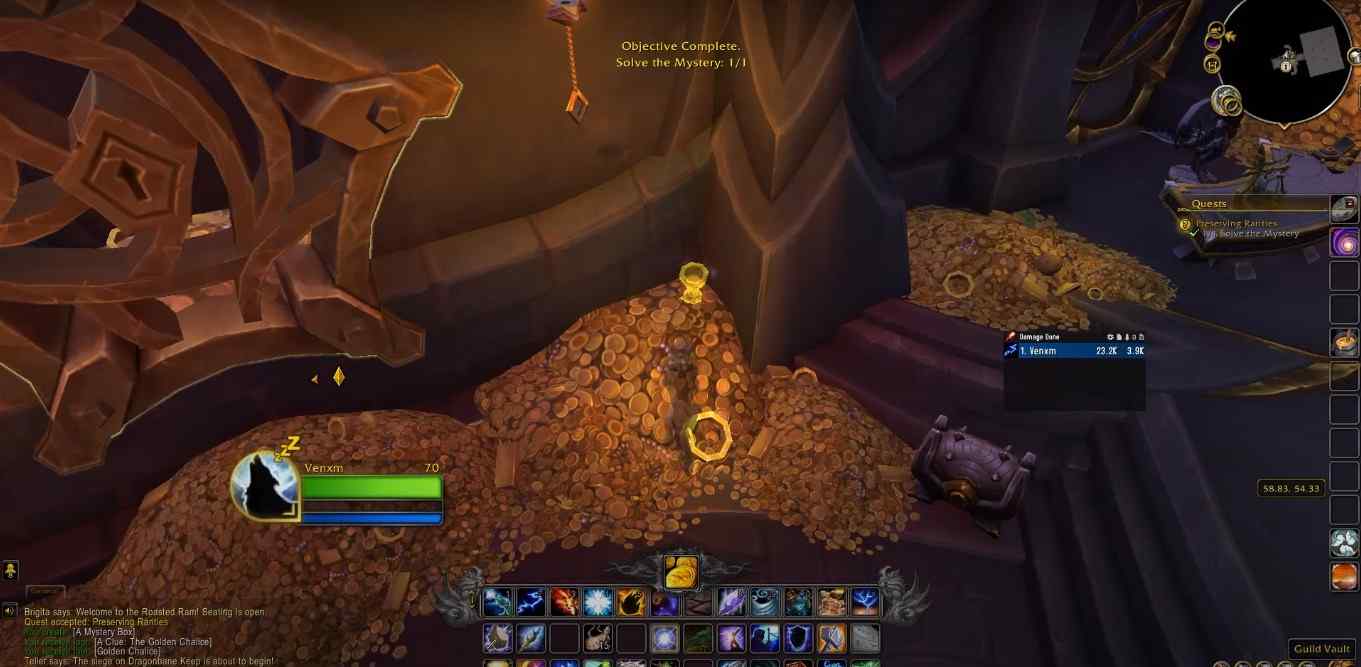
The first quest is called Preserving Rarities and you will talk to him after accepting the initial quest and say I’m ready. Once the preservation knows, you will receive the mystery box inside the inventory. Right-clicking on it will open it and the golden chalice has to be looted the first clue for the golden chalice
Walk up to Bobby Carlisle, who will be sitting right here at the bar inside of the Inn and they are going to give a hint at going into the bank. Move into the bank to find what is required. Heading into the Valdrakken bank and on the left-hand side the players are going to see Guild Vault.
Underneath that Guild Vault, the player can see a yellow highlighted missing chalice. Interact with it to place the chalice back down without anyone noticing.
Once the players drop the Chalice, it will complete the Preservationist part of this quest line. Head back to preservationist Kathos and turn in this quest.
Ceremonial Spear
You have to speak to Kathos again and you’ll hand in for a quest called Relic Thief which will give you Tuskarr Ceremonial spear. Head over to the Tuskarr village in Azure span and within the Inn. You will find Elder Poa, speak to them, and go through dialogue and now spears should change into some costs and yield in spear. The Elder Poa tells you that this is not a ceremonial spear but for a different tribe. This tribe is going to be found in Northrend and you are going to bring the spirit to Northrend.
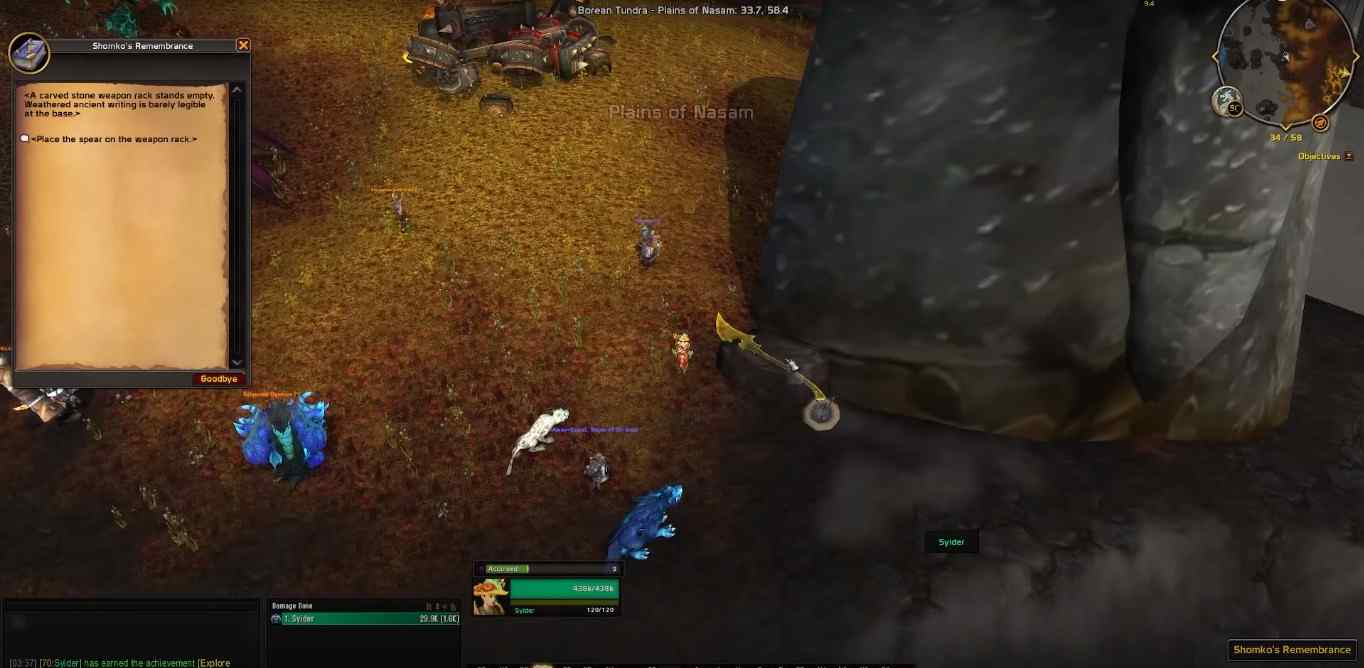
If you have a mage character then simply use your teleport or portal. Move into the Orgimmar and use the actual portal inside of the portal room to get the crystal song version of Dalaran. Head over to the Dragon Blight to Moakai Harbor. Once you get there, speak to an elder inside of the main building, who tells you that the spear is going to be placed on a specific monument. With that obtained, we can head straight to the final destination. Which is going to just warsong hold in borean tundra. Head over there and you will find a statue like a Tuskaar-looking statue. Place the spear in front of the statue.
Thinking Cap
Talk to Bobby Carlisle, who is sitting next to the bar and he is going to give Thinking Cap notes. To get the first piece of the thought-calculating apparatus, you need to talk to Clinky Click Shatterboom, who is the engineering trainer. Speak to them.
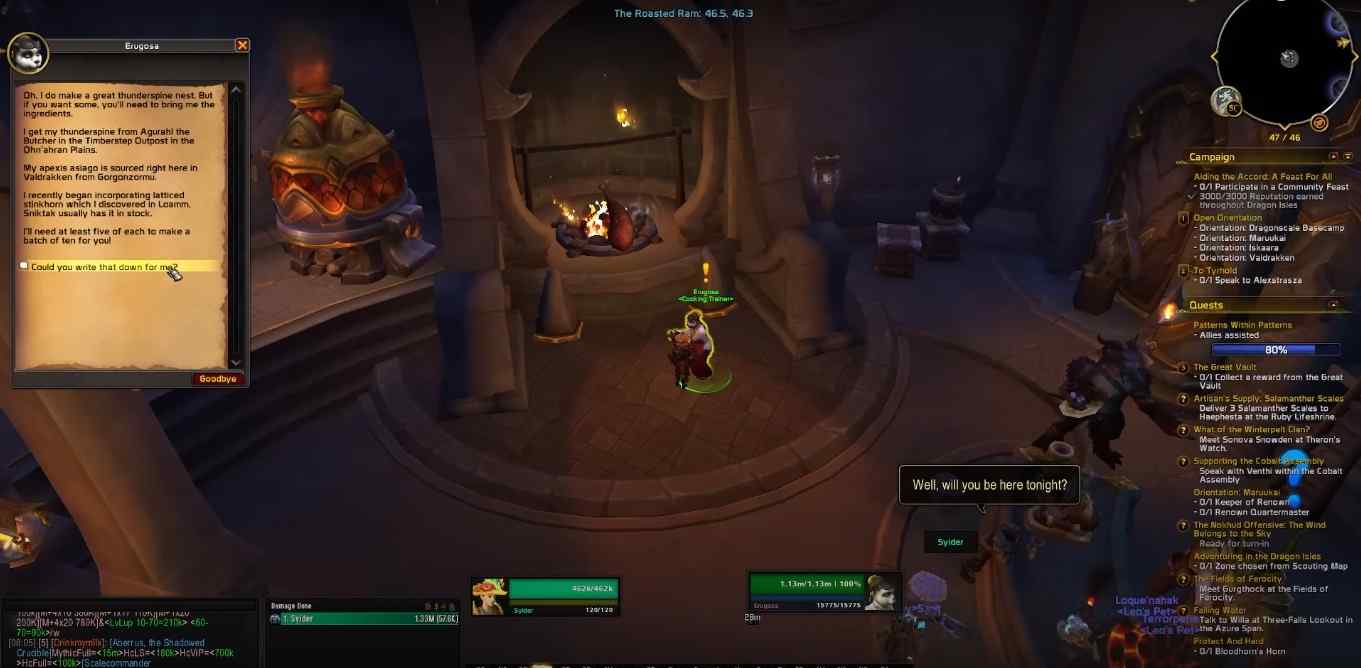
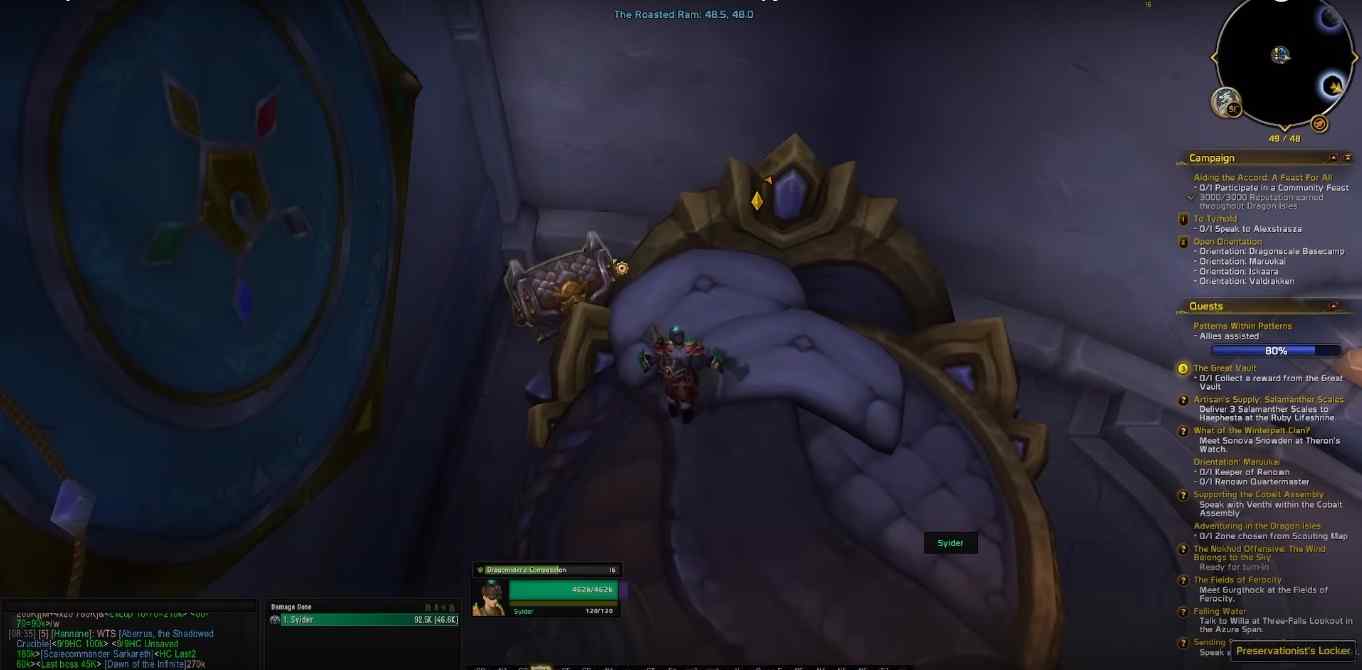
To get Shatterboom to help, you need to get Thunder Spine Nest. Which is created by Erugosa who is the cook inside the Roasted Ram Inn. Go back to the Inn and speak to her. She will tell you what ingredients she needs to make the secret dish to get Shatterboom to help you.
The first ingredient is the Apexis Asiago, which can be purchased from Gorgonzormu in Valdrakken which is located in the Artisan area. Speak to him and purchase Apexis Asiago. The next ingredient is 5xThunderspine tenders, which can be found by butchers in the Ohn’ahran Plains. This can be found in the timber step Outpost. The next ingredient is the Lattice stinkhorn, which can be purchased from Snick Tech which is in Loam. Move into the Zeralette Caverns.
The third ingredient is Downy liner. Talk to Gryffin, who will be standing next to the engineering trainer in Valdrakken. Bait them with a fresh Tyranha. To get these, you have to loot them from the river called the Cascades. To get hungering Tyranha, you have to kill to loot in the Cascades. Kill one of them and loot up the fresh Tyranha. Bring it back to Gryffin and throw it to him, then you will get Downy Helmet liner.
The Fourth ingredient is the Crystal Ocular lenses. Talk to Shakey Flatlap, who is the jewel crafting supply vendor. There are two options. It is recommended to choose the Thousand Gold option. You can pay a Thousand gold to obtain the required item. Tell him that you will settle his tab at the bar and there’s a secret in Valdrakken where you have to pay 346 gold. You can pay him directly a Thousand gold or pay 346 Gold in the secret Inn to get the crystal ocular lenses from Shakey Flatlap.
Now get the quest unfinished thinking cap which can be done by clicking on the thought-calculating apparatus in the bag. Clicking apparatus Fangli hoot which is also located in the Valdrakken. She will be in the doorway of a little house which is located on the left-hand side of the barbershop if you are facing the barbershop.
Speak to Fangli Hoot and they will give you a tricked-out Thinking Cap. Done speak till you equip a Tricked-out thinking cap. Make sure that you click it in your bag, learn the toy, and equip the toy. She will give you the next step of Clues.
Talk to her again and she will tell you to visit 7 different places to get Clues as to where the treasure is. There is an arrow directly behind the Fangli Hoot on the wall which tells that you have to go where the dragons are when they are babies. Each arrow will lead you to the next clue.
- The first place will be the Little Scales daycare area. Find the next clue underneath the bookshelf inside the Little Scales daycare area.
- Skinning banner near The Artisan Market.
- Jewel crafting station.
- Alchemy crafting station, underneath Alchemy table.
- Top of the Auction house, Fly over to the roof.
- Click on auction house brings you to a blacksmithing building, the arrow will be between the mining trainer and blacksmithing trainer.
- Click on the auction house arrow, which brings you to the Seat of the aspects. Arrow will be found while running upstairs and to the left, you can see the arrow.
- Emerald Conclave, Underneath the waterfall.
Clicking on the piece of treasure that is underneath the last arrow will tell you that the treasure has been found. Loot the treasure and you will complete day two of Secrets of Azeroth.
An Inside Job
Move back to Valdrakken Inn to speak to Bobby Carlisle who will give you quest An Inside Job. Move to Fangli Hoot and get Fangney’s note as well as the artifact storage key fang Lee’s note is going to bring you Roasted Ram Inn. Head to the second floor and run around this ramp-up and across you can see a bed to the far left of this room. Loot the chest from behind the bed. Take the items that you found in the Preservationist’s locker that you just looted Appraiser sazsel Sticky fingers.
Sazsel can be found inside the house kind of outside of the emerald enclave in Valdrakken and she will give you a new quest called the preservationist cleared. She will tell you to return this artifact that you found back to the same spot you looted. Move back to Roasted Ram Inn in Valdrakken to the second floor again on the bed and then behind the bed right corner put the banner back and then turn the quest into Fangli Hoot.
Torch of Pyrreth
Sure, here’s a simplified version of the instructions:
- Start the “Securing an Artifact” quest by talking to Tithris at the Roasted Ram.
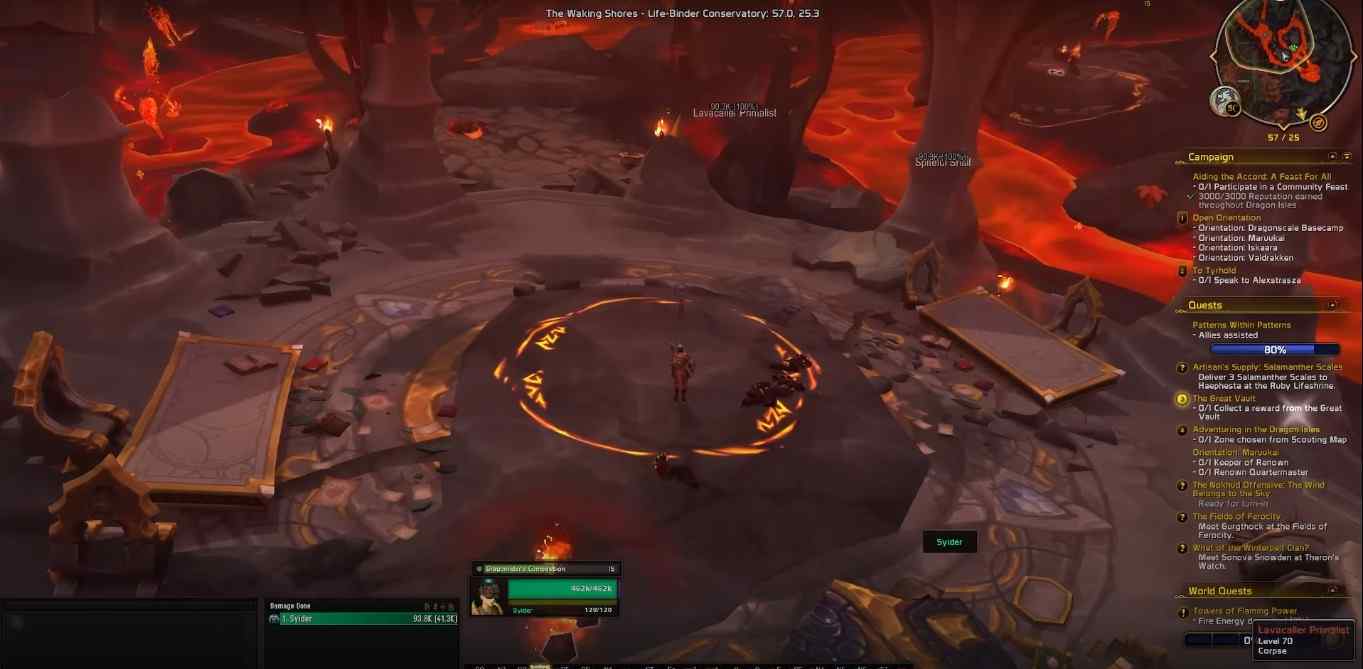
- Go to the Life-Binder Conservatory at the far north of the Waking Shores.
- When you arrive, put on the Thinking Cap and find levers in the building shown in your image. Activate the lever.
- Head north to a ruined tower and find the second switch inside.
- Find the third switch in a nearby building filled with shelves, located north of the tower.
- Then, go west to the remains of an inn. Inside the fireplace, to the left, there’s a big torch. Interact with it to start the “Artifact Secured” quest.
- Return to Preservationist Kathos at the Roasted Ram in Valdrakken, turn in the quest, and get the Torch of Pyrreth. Add this torch to your collection.
- Kathos gives you another quest to learn how to use the Torch of Pyrreth. For this, go to the Ruby Enclave and find a small building where Gardener Cerecus sells stuff. Use the Torch there to find a chest. Take what’s inside the chest back to Kathos.
- Talk to Bobby Carlisle at the Roasted Ram to get the “A Chilling Ascent” quest.
- Go to Vakthros in Azure Span. At the bottom of the tower, near the teleport pad and a big door, head right towards a pillar with a glowing blue dome. With the Torch of Pyrreth, you’ll find a tablet at the base.
- Read the tablet to start the “A Knowledgeable Descent” quest.
- Finally, return to Bobby Carlisle in Valdrakken to complete this quest.
A Chilling Ascent
Talk to Bobby Carlisle who will be sitting at the bar. He will give the clerk notes. Grab the Clerk’s notes from him. Open them up and give them a read. You have to go to Azure span. Head over to the map the coordinates are. (/Way The Azure Span 77.9 32.1)
When you land and go around the corner. You will find a locked door with a bubble in the middle of it. Use the Thinking Cap at the Door to talk to the door and you need to be able to get it where to go next. It will bring you to the pylon on the left-hand side of the door. If you are facing away from the door and running out, you’re going to turn left and then you will see it on your map. (/WAY THE AZURE SPAN 78.8 32.4)
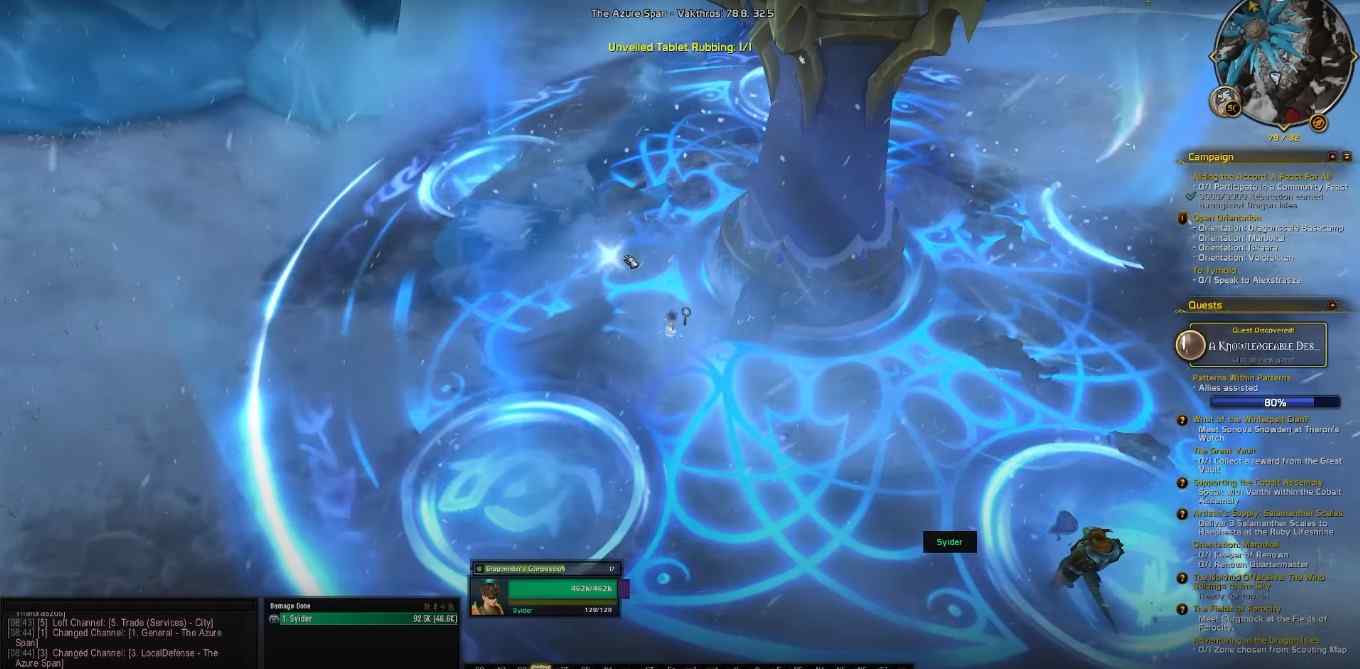
This is where the little tower pylon is. Use the Torch of Pyrreth next to the pylon then you can see the tablet appear. The tablet has a spawn timer, so if someone just interacted with the actual tablet then it might spawn for you. You just have to wait for a couple of minutes and try again. Click on the tablet and it will give you another quest which will bring you back to the Bobby Carlisle in Valdrakken. You will receive achievement a chilling Ascent.
The Idol of Ohnahra
Move into the Roasted Ram which is loaded in the ValDrakken and you have to talk to the innkeeper who is going to give you the quest Preventionists dispatch 2. Follow the below instructions accordingly and complete day 6 of Secrets of Azeroth.
1. Talk to Tithris to get a note about an idol.
2. Go to the Eternal Kurgans in the Ohn’ahran Plains.
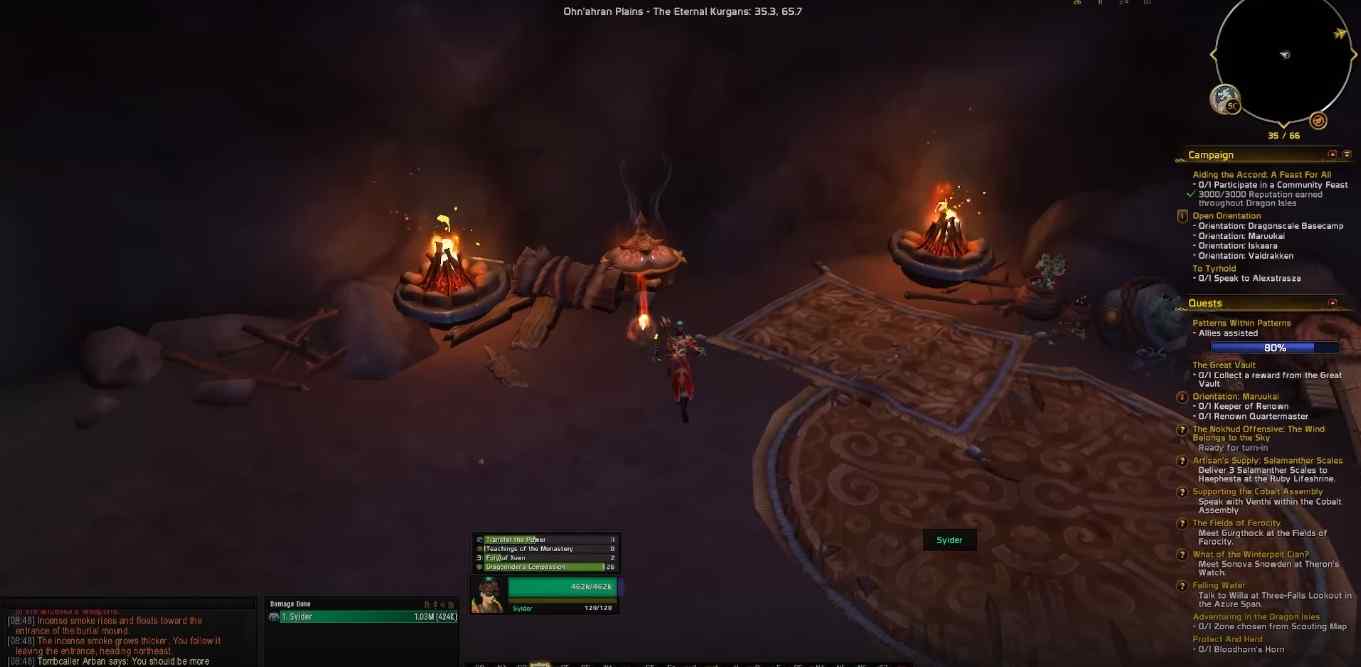
3. Enter the burial mounds in the order shown in your image. Wear the Torch of Pyrreth to see braziers.
4. Light the first three braziers. The fourth one, in the Teerakai burial mound, will become visible.
5. Find the fourth brazier. The Idol of Ohn’ahra will appear nearby. Pick it up to start a new quest.
6. Talk to Preservationist Kathos. He will teach you how to use the Idol of Ohn’ahra.
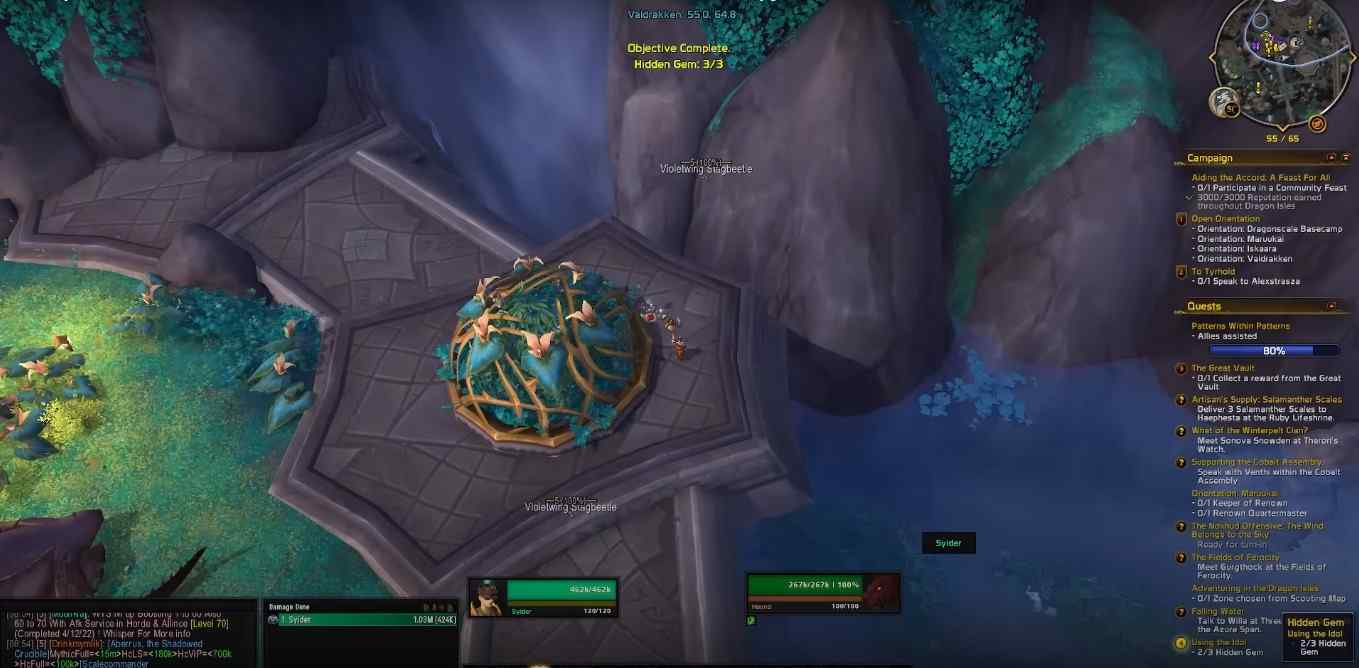
7. Use the Idol to find a beam pointing to one of three gems. All gems are in the plaza at the bottom of the stairs leading to the Seat of the Aspects.
8. After finding all three gems, return to Kathos and complete the quest.
9. Kathos will give you another quest, “Into the Sands”.
10. For “Into the Sands,” go to the Shifting Sands in the southern part of Thaldraszus.
11. Use the Idol of Ohn’ahra to find Time-Lost Fragments in the Shifting Sands.
12. Collect three fragments and combine them into an incomplete tablet.
13. Finally, bring this tablet back to Preservationist Kathos.
Move back to Preservationists and turn in the quest and you will get the achievement for day six the who done it achievement for the idol of Ohnahra.
ALSO READ: DOT IN WOW
Shifting Sands
This quest is going to start again inside the Valdrakken. Speak to the preservationist Kathos and she will give you a clue called Shifting Sands. Open up and take a look at what is going to bring you to The Temporal Conflux. Move into the Thal dresses. It will be shifting time area. You have to find the three time-lost fragments in this area. Use the Idol of Ohn’ahra which we got from day six the idol of Ohn’ahra. Equip your toy and you can see the eyeballs. They are going to glow in the proper direction that needs to run to find these three fragments. The fragments are very close together. The location for all three fragments is the following.
- First fragment: /way 58.51 78.43
- Second Fragment: /way 58.79 798.24
- Third Fragment: /way 59.30 78.82

The Second Fragment is almost directly in front of the first fragment. It will be behind the tree. The third one will be located in the water. The idle is going to point you in the proper direction only if you are equipped and its eyeballs are going to glow. Once you find all three fragments, you need to open up your bag and right-click on all three of these fragments so make sure you have all three of them.
You will get a tablet after right-clicking. The tablet is going to give you a quest when you close your bag. You can check the quest pop-up under your objectives. Accept the quest and move back to Valdrakken to turn the out of the Sands Quest into the Preservationist Kathos to end the day.
What’s in a Mold
Talk to Bobby Carlisle in Valdrakken Inn. Head over to the Obsidian Enclave which is the blacksmithing area of Valdrakken and speak to one of the Dragons within the building to discover what this key is all about. Run inside the blacksmithing area and talk to the dragon (Weaponsmith Koref), who will be on the left-hand side of the building. He will give you another quest that leads us to the Ohn’ahran plains. Move into Cloverwood Hollow which is located in the Ohn’ahran plains. Move into the coordinate: /way Ohn’ahran plains 63.37, 56.95;
You can see the only building in this area on the map. Land inside of this building. Equip the Torch of Pyrreth as well as the idol toy that we obtained before. Also, equip the Thinking Cap as well. After landing inside the little building on your map, you will notice the Torch of Pyrreth start casting a fire beam between you and the tablet that you are looking for that’s on the ground.
Click on the tablets and will receive the next clue. This clue is going to be in cogs and bolts format the coordinates that are being used by Thinking Cap. Make sure that your Thinking Cap is zeroed out by reapplying it. Just make 180 turns around and run in the opposite direction of this tablet and your Thinking Cap if you hover over it will tell you the same coordinates that are listed in this clue. Do a 180 and run straightforward and you are going to notice a key mold on the ground. It is directly behind the tablet that you just looted. It is not hard to find and using cogs and bolts format makes it much easier.
Move back to Valdrakken after you loot this mold on the ground and speak to the dragon (Weaponsmith Koref) inside of the Obsidian Envlave that started the original Quest and you will get the achievement for today. Simply locating Ohn’ahran Plains that we need to go to and understanding how Cogs and Bolts work for the coordinates.
Forging is the Key
Move into the Valdrakken and talk to Bobby Carlisle who will be next to the bar. He will give the quest reforging the legend. Move to the Obsidian Enclave and speak to the dragon inside the blacksmithing area. Talk to Weaponsmith Koref and he will tell you that you need to complete the next quest which is Titan key materials list. Once you get that list, you need to gather items that will be located on the waking shores.
These items are hard to find.
The first item that you need to find is the Rose Gold Dust. Which can be found in the waking shores over by the overflowing rapids. Equip the Idol of Ohn’ahra to track the Rose Gold Dust. Collect 50 Rose Gold Dust from the pallets that are on the ground.
You have to collect four or five because you loot these items, they give you 10 to 12 at a time. Loot enough of these pallets off of the ground in this area. It is a kind of random spawn. Use just use the Idol of Ohn’ahra to find them, using the idols makes it easier. Just click on these little piles to loot them and then just continue using your idol toy to find the rest until you have collected at least 50 Rose Gold Dust. (/way #2022 48.3 46.1 Rose Gold Dust
area)

Once you collect enough Rose Gold Dust, you have to find 8xIgniousFlux. Move into the Obsidian Citadel because the clue tells you to, moves into that area where lava is meeting salt water that going to be at the end of the Obsidian Citadel. Right on the water line. You the Idol to locate these tiny little piles on the ground. They are silver in color. (/way #2022 21.3 76.7 Igneous Flux area)
Once you collect all eight Igneous Flux and 50 Rose Gold Dust Head over to Earth-Warder’s Forge in Obsidian Citadel. Speak to the weaponsmith Koref, whom you spoke to inside of Valdrakken the one who gave us the quest.
If you have not unlocked this area yet. If you have not chosen between two brothers then you are not going to be able to see any of the stuff. If you have to unlock this area and choose between Sibelian and Wrathion then you have to fly up top. Talk to a dragon, skip the quest line, and go back to weaponsmith Koref.
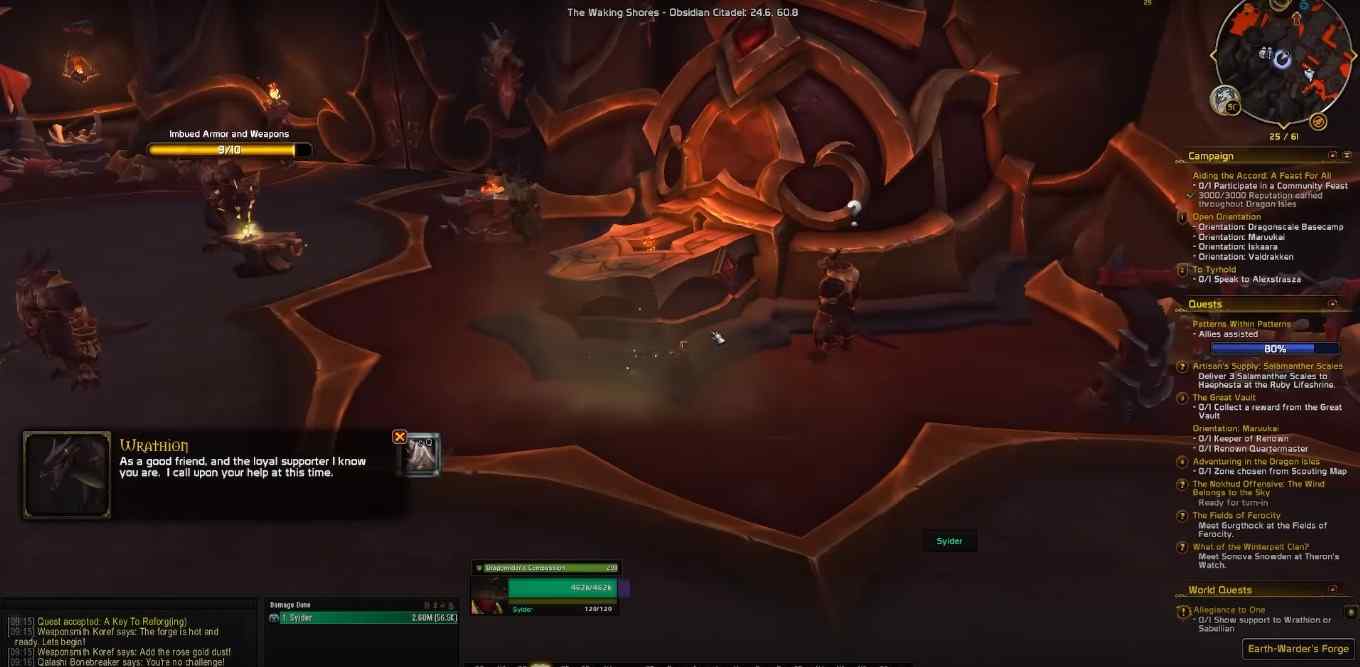
He will give you a quest called A Key reforging. When you get this quest, you need to immediately equip the Torch of Pyrreth and speak to him again. He will give you three steps. Just click the button that’s going to appear at the bottom of your screen. He will tell you to put in the dust, put in the flux and once you are done with it, click on the mold of the middle and it creates the key. Simply turn around and turn the quest into weaponsmith koref and will get you whodunnit? an achievement for today which is forging is key. You also get cool transmog items from it.
A Proper Burial
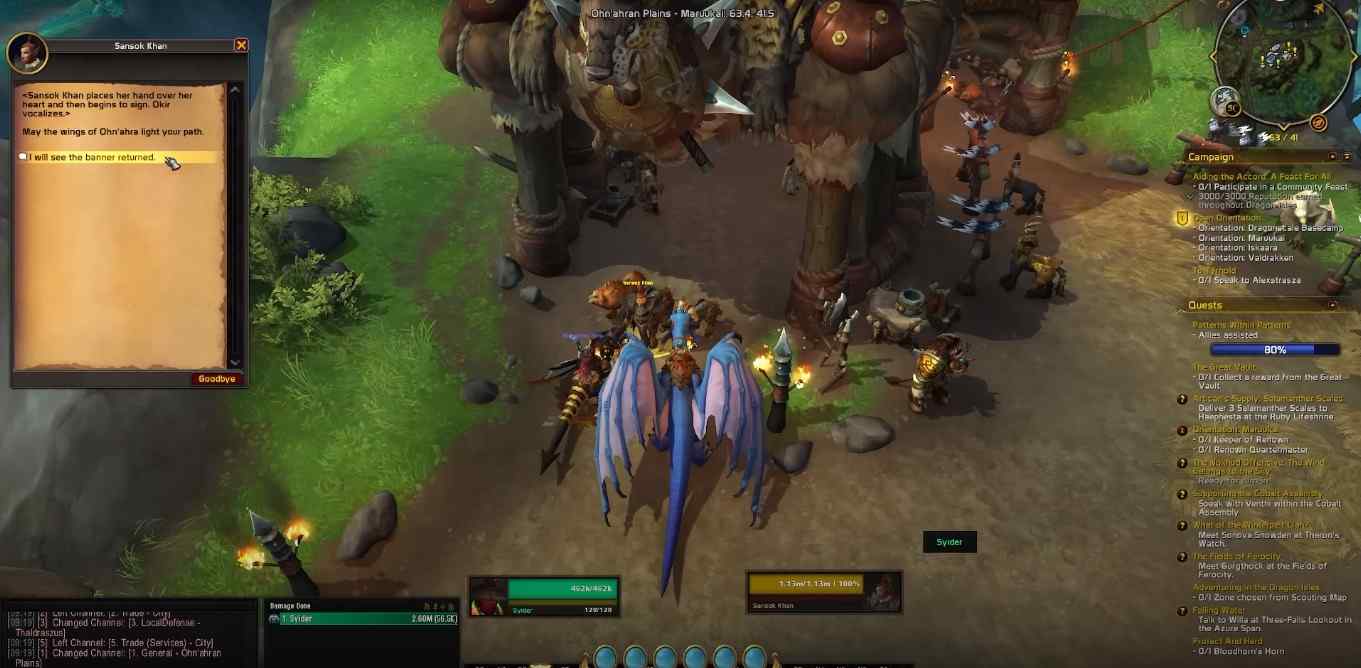
Move into the Valdrakken and speak to the preservationist who is going to give you the first quest that leads us to the Ohn’ahran Plains. Do not get an item you can click on inside of your bag. It’s just a banner that tells you where to go to analyze this Banner that has been given by the preservationist.
Head to the Maruukai in the Ohn’ahran plains and talk to Sansok Khan who is going to be located inside of the Ohn’ahran plains. (/way 63.38, 41.42 Sansok Khan). Speak to her and show her the banner. She needs you to locate Jahara inside the pinewood post. Jahara is going to be located in the Pinewood post and you are going to speak to her. (/way 81.33, 59.26 – Jahara)
She gives you the first clue and the clue is a picture of a very large statue that you are going to need to locate. Move into the following areas.
- Aged marker 1 – /Way #2023 83.9 48.5 First Marker
- Aged marker 2 – /Way #2023 78.6 83.3 Second Marker
- Aged marker 3 – /Way #2023 60.7 63.5 Third Marker
- Aged marker 4 – /Way #2023 31.7 70.3 Fourth Marker
- Aged marker 5 – /Way #2023 43.4 48.0 Final Marker
Find the stone piles on the ground. You don’t have to use the Idol to find the statue. But to find these little piles you have to use the Idol of Ohn’ahra. Click on the rocks and it will give you the next clue. The second clue is going to bring you over to Cave in the Ohn’ahran plains. Equip the Idol of Ohn’ahra in the cave to find the piles of stones it does not trigger until you walk into this cave. This cave can be found within the rorin dragon springs. Walk inside, run up the little ramp, and turn the corner and on the left-hand side, you can see the Piles of rocks.
You have to move into the Dreadsnare Caverns to search the area for placing a burial banner for Ishtar Rethon. You will see a glowing yellow banner where you will place the burial banner. To end the day and get your achievement. Once you place it your quest will be completed.
Kirin Tor Knowledge
Talk to Bobby Carlisle in the Valdrakken who is going to give us a note about the Kirin tour. You need to head towards the Karazhan inside of the Deadwind pass. For horde players, the easiest way was to go to Stranglethorn Vale. Teleport to Orgimmar and then took the Zeppelin to Stranglethorn and flew right over Duskwood and into the Karazhan. For the Alliance, it’s easier because you just go to Stormwind, fly from Stormwind to Dead Wind Pass, and enter Karazhan.
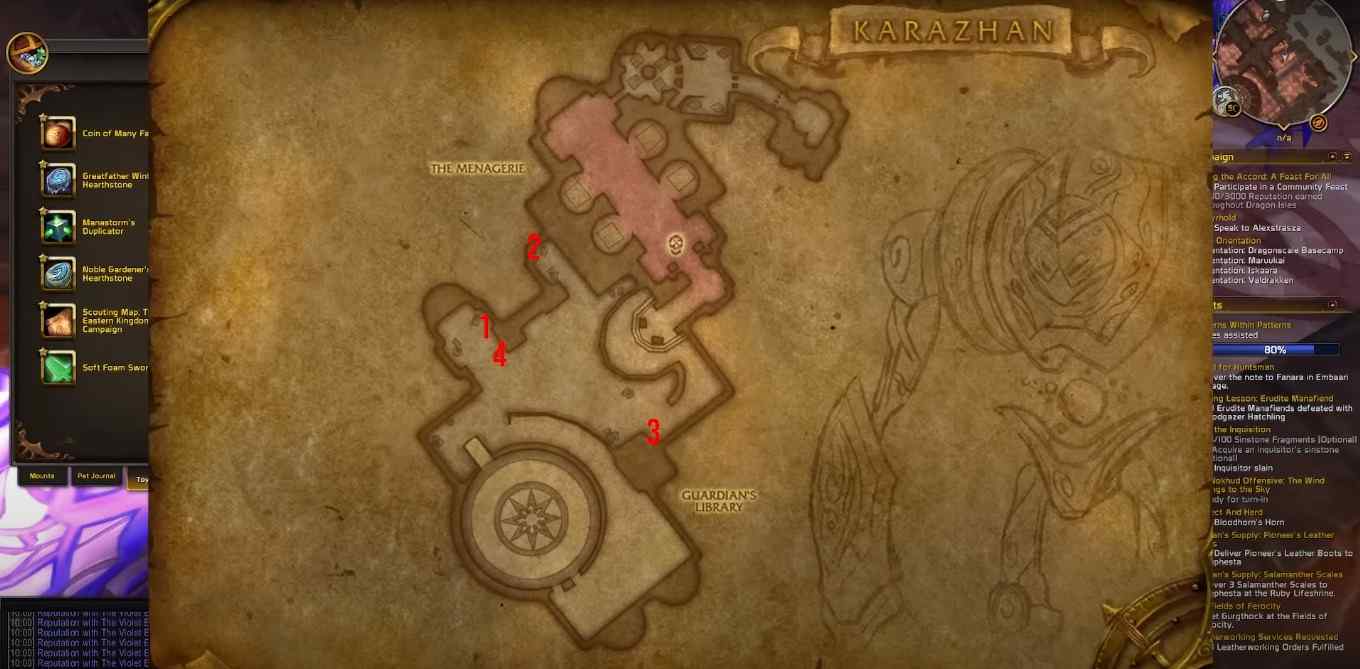
You will get into the Guardian’s Library. You have to kill some bosses unless you can use the back door as we do in classic. You have to kill the opera and that’s going to waste your lockout now to unlock the opera boss you also have to kill the previous bosses in the dungeon. Once you enter the Guardian’s library, you have to stand where the Managerie ends the Guardian’s Library begins. Equip the Thinking Cap inside of Karazhan.
It is going to zero out and you have to follow the coordinates to the bookshelf. Equip the thinking cap to get a general direction of where you need to go and then equip your Idol of Ohn’ahra to get the exact location. The First bookshelf will lead to another bookshelf. The yellow Marker shows Book#1, the green marker shows Book#2 and the blue marker shows Book #3. The red marker shows Tyr’s legacy (Final Book).
We are going to keep following the cogs and bolts’ coordinates until we get put back on the final bookshelf. Which will give us Tyr’s Legacy. It’s going to immediately start a quest once we loot it and it will bring you back to Valdrakken to talk to Bobby Carlisle. He will give us the achievement for the day.
Under Suspicion
Move into Valdrakken and speak to Bobby Carlisle. He will send you to Fangli Hoot Who gives us the points of interest all around Valdrakken. It’s places like the Titan statue, the fountain, just the sandbox different little places to visit. Move into all of these points of interest and zero out your thinking Cap. The first clue is the fountain outside of the seed of the aspects you just zero out your thinking cap and follow the coordinates from there. This in the end leads you to the auction house inside of the Valdrakken.
- /Way 44.22, 60.15 Note 1
- /Way 74.07, 57.39 Note 2
- /Way 52.92, 28.42 Note 3
- /Way 37.71, 37.07 Note 4
- /Way 31.81, 70.41 Note 5
- The sixth note can be found in the Roasted RAM Inn.
Use the Idol of Ohn’ahra which will lead you directly into the auction house. You will find the note in the auction house. It was the auction house bill of sale. Click on it and you will get a final quest to return to Fangli Hoot who will give you the achievement for the day.
ALSO READ: Augmentation Evoker PVE Guide
A Curious Orb
In the Valdrakken Inn talk to the Innkeeper he is going to have a question mark above his head. If you have done all of the previous days, he would have a question mark above his head to be able to complete a quest where he will give you today’s clue. Today’s clue is the Preservationist dispatch 3 little clues here and if we open it up it’s going to tell that we have to head over to Storm Shroud Peak. Storm Shroud Peak is located in Thaldraszus near the temporal area of the Sands of Time area.
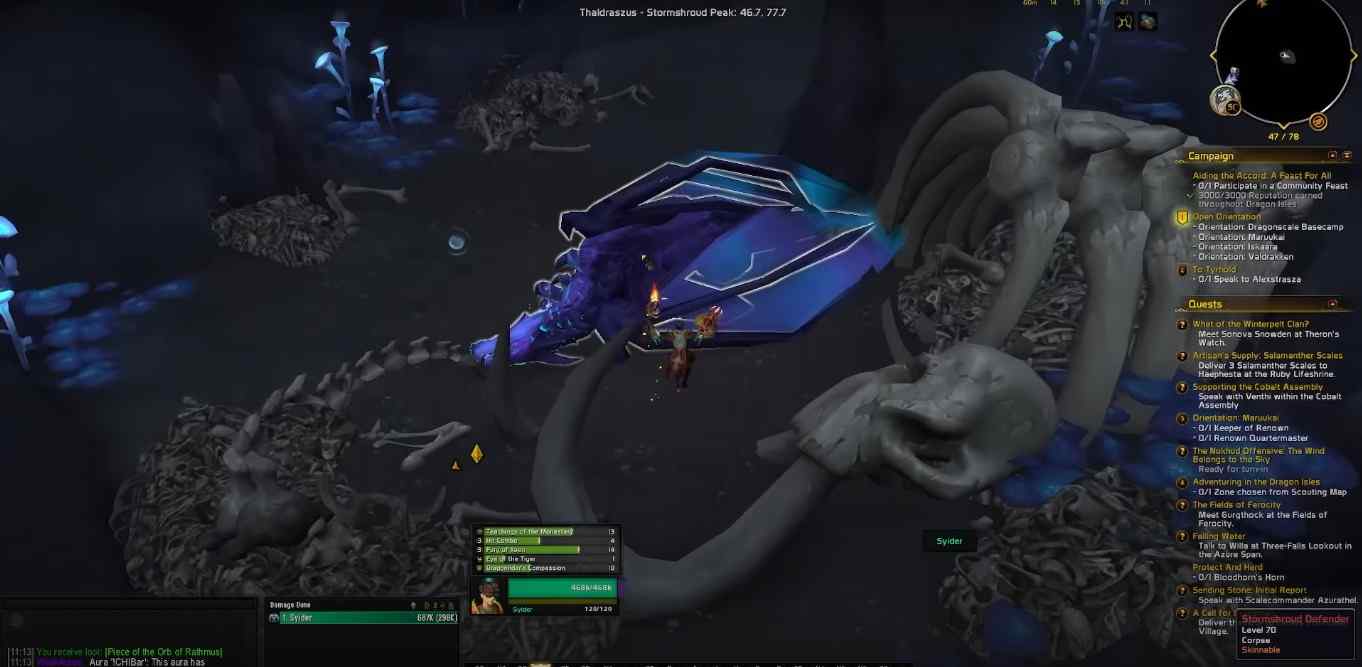
Once you get here, there are three caves. Start with the first cave, there will be a sleeping dragon. Behind the sleeping dragon users will find the tablet. you should equip a torch of Pyrreth. Torch will burn away the magic and reveal the tablet for you to read and it will give coordinates to the next area. These coordinates correspond with mounds of dirt, they do not correspond to the other tablets that give you the other coordinates for the mounds of dirt. Equip the Idol of Ohn’ahra which will lead you to actual mounds of dirt that you are looking for to find all three pieces of this orb that you are trying to put together.
Coordinates for Tablet 1
/Way #2025 50.2 81.0 Tablet 1
/Way #2025 49.5 79.7 Orb 1
Coordinates for Tablet 2
/Way #2025 46.6 77.6 Tablet 2
/Way #2025 45.9 79.7 Orb 2
Coordinates for Tablet 3
/Way #2025 48.7 76.4 Tablet 3
/Way #2025 50.2 78.0 Orb 3
All of these coordinates are going to be saved in the preservationist’s note in your bag. so, you do not have to screenshot it or keep coming back to read the coordinates. Simply open up the bag, click on the Preservationist notes, and then click through the different tabs at the top which will give you all the clues.
Combine all the three orb fragments if you have collected all of them. Move back to the Tithris with the newly crafted orb in the Roasted RAM and you will get the achievement.
The Race
Speak to the Preservationist who is going to give you a Treacherous race quest. Once you complete, get the ancient tier hold artifact notes. If you open up this clue from your bag there will be a lot of information.
Head over to the Tyrhold which is going to be found directly across from the Valdrakken. Just follow the little reservoir waterway and it will directly lead you to Tyrhold. Land on the Tyrhold and doesn’t matter where you land.
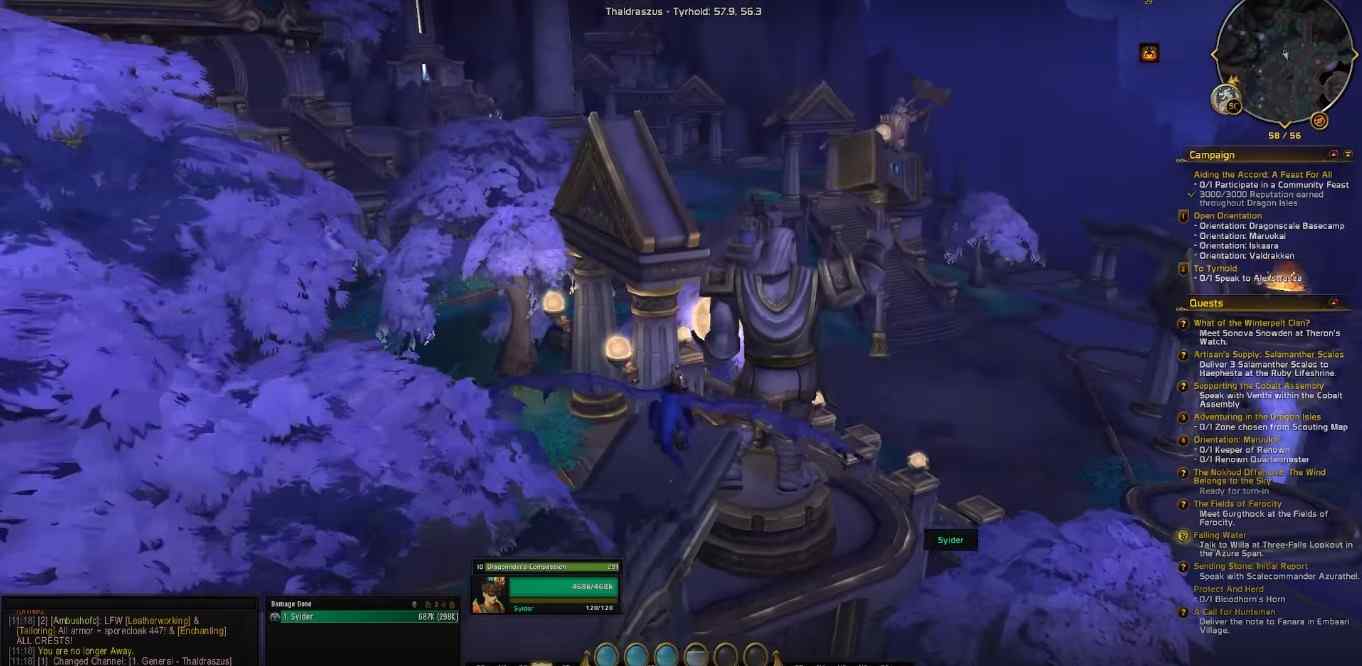
You have to light up all the orbs while using the torch of Pyrreth. Equip the torch of Pyrreth and move close to the big statues that are holding big glowing orbs. The torch of Pyrreth is going to grasp onto those orbs and it will take 3 to 5 seconds. Once it attaches to these orbs, it will light them up and there will be a kind of fire around these orbs. Once done with one orb move to the other orbs. The coordinates for all the 8 orbs are the following.
- /Way #2025 59.9 61.0 Orb 1
- /Way #2025 57.1 64.4 Orb 2
- /Way #2025 57.1 62.9 Orb 3
- /Way #2025 57.9 61.8 Orb 4
- /Way #2025 57.9 60.5 Orb 5
- /Way #2025 58.0 56.9 Orb 6
- /Way #2025 57.9 56.0 Orb 7
- /Way #2025 59.8 56.4 Orb 8
Simply fly to these titan statues and light the orbs up with the help of your Torch of Pyrreth. The Idol of Ohn’ahra will point you towards these statues for you to light up these Orbs with your torch.
Once you are done with all eight of these orbs, move into the dead center Tyrhold inside of the forge area. You will see the face on the wall. Move back where his face is and in a couple of seconds, the forge is going to channel through your Touch of Pyrreth. The blue beam will be coming out of the eye. That’s how you know that you have collected all eight orbs. Once you channel, it is going to make mobs around you friendly. (/Way #2025 61.2 58.7 Tyrhold Forge)
Head towards the rings that surround the central area you are going to almost area like a dungeon. Start on ring 1. There are two doors on either side of these rings and it is going to be necessary to go to the odd levels because the second ring does not have these doors. The third one does and the fourth one does not and the fifth one does have the doors. Move into these doorways and you will see the broken vases on the ground. Your idol of Ohn’ahra will point you directly to them. There are two doors on any of these rings that we will move into and you will need to enter both of them to pick up all the required pieces. There are a total of six pieces that you are going to be picked up. The coordinates for all six pieces are the following.
Ring 1
/way #2025 60.07 55.42 Room Ring #1
/way #2025 60.09 62.03 Room Ring #1
Ring 3
/way #2025 59.70 55.57 Room Ring #3
/way #2025 59.73 61.81 Room Ring #3
Ring 5
/way #2025 61.61 61.70 Room Ring #5
/way #2025 61.55 55.89 Room Ring #5
The Idol of Ohn’ahra will point you to the first piece that you are looking for. Fly across the first piece which will bring you to the second piece. They look like the broken vases. Loot a total of six items that are going to turn into four items. You need to put one of these keys together. So, they are going to be these two pieces that make Titan block key.
You also need to use the Titan Cube Housing and the Titan energy core to turn it into a Titan energy cube. You will have four items at the end but you will start with six. Combine the key fragments and combine the Titan Cube Housing with the Titan Energy Core to create the energy core.
Once you are done with it, you have to exit the inner rings and find the giant pillars with huge orbs on the top of them. There is a total of 4 of them. They are power relays that are located all around the Tyrholds. There are two on the top layer and two on the bottom layer inside the areas of Tyrholds. The Coordinates for all four Total Power Relays are the following.
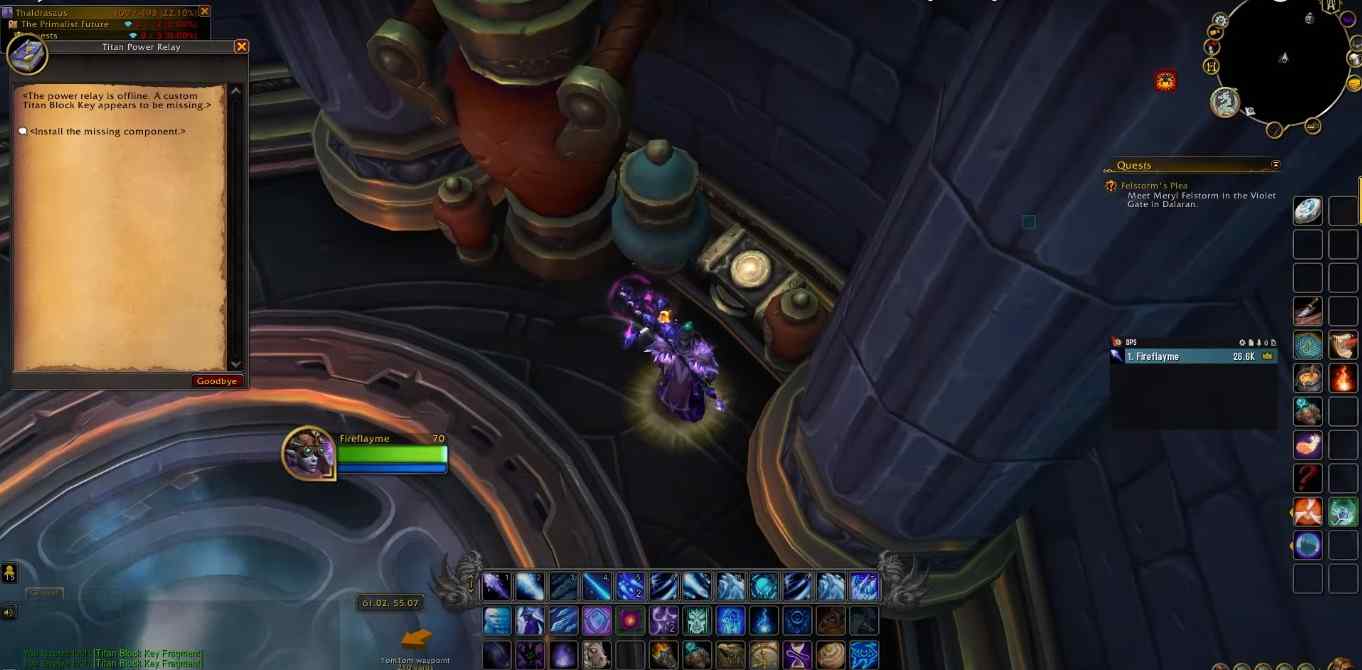
- /way #2025 59.3 56.8 Titan Power Relay
- /way #2025 59.5 60.6 Titan Power Relay
- /way #2025 61.0 62.4 Titan Power Relay
- /way #2025 61.0 55.0 Titan Power Relay
Put all the items in the power replays. Once you put items, fly back to the forge area, the dead center of Tyrhold, and fly up to the top set of the stairs. If you trigger all four of these relays properly, you will see quests show up on your map. Run straight to the titan box and pick up the ominous artifact quest which is right on the throne. Complete the steps that will tell you to pick up the orbs and you have to kill two bosses. Loot them. Move back to the little orb machine and input the two pieces that we collected. Once you are done with it, see the preservationist is up now here and we can turn in the quest to complete the final whodunnit Achievement. We get the Pattie Llama mount and also the title reward.
Community Rumors
Many players know about the secrets of Azeroth’s Event but not a lot of players know about the hidden satchels that are being found all over the continents of the World of Warcraft. Blizzard had made a couple of posts and players just noticed and they wanted to go and investigate what could be the hints to find the hidden Satchels all around the world of Warcraft.
Satchel 1 (Community Rumor #1)
The first satchel is going to bring us to the Eastern Plaque lands where we have to find the stump that is located by Corin’s Crossing. It is right on the outer edge of where the bridge is located. Fly here and loot the Plaque and it is automatically going to equip your Thinking Cap once you click on this Plaque.
Follow the coordinates that are given to you when you click on the plaque and it will bring you to the mound of dirt that is located right behind one of these houses inside Corn’s Crossing. Click on the pile of dirt and it’s going to give you a buried satchel. (/way #23 55.2 59.4 Buried Satchel).
Satchel 2 (Community Rumor #2)
To find a bag in the Bloodvenom Falls area of Felwood, go to these coordinates: (/way 42.2, 48.1.

Satchel 3 (Community Rumor #3)
To find the third satchel in the Thousand Needles area:
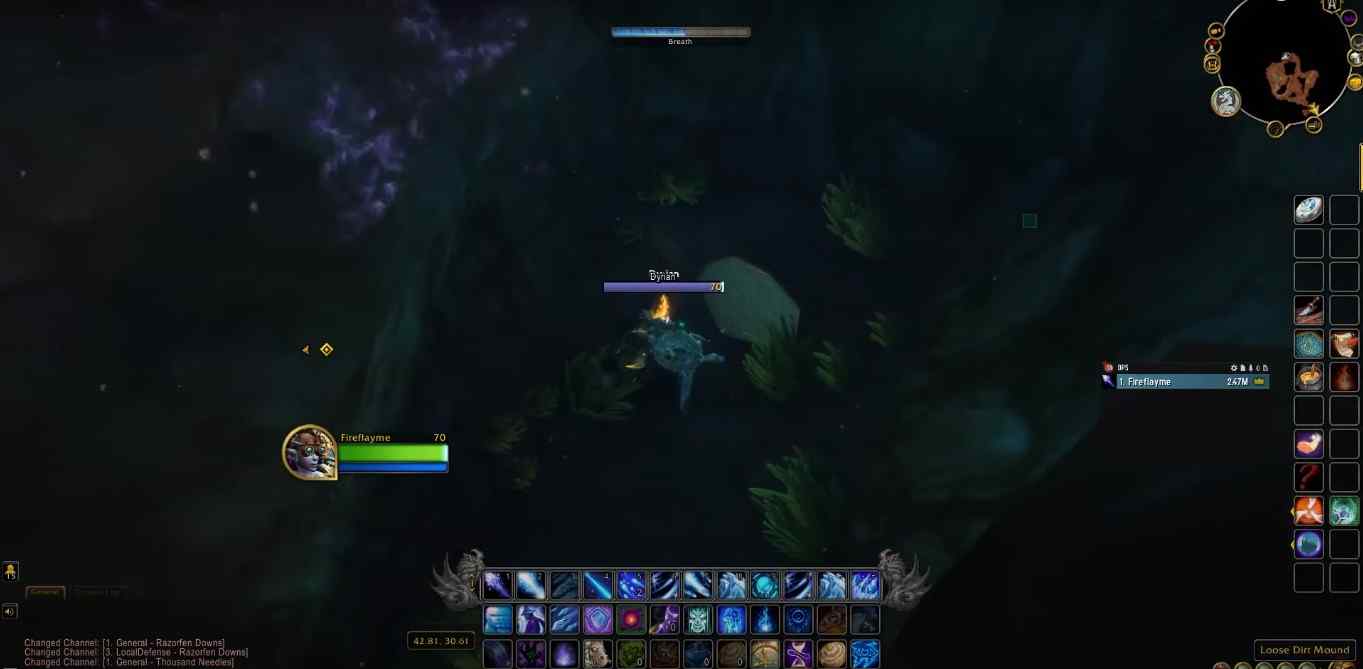
Go to the underwater cave below Razorfen Downs. The entrance to the cave is at these coordinates: (/way 43.9, 37.4 Cave Entrance) Inside the cave, find the buried satchel at these coordinates: (/way 42.7, 30.6 Buried Satchel)
Satchel 4 (Community Rumor #4)
To find the fourth community bag:
1. Go to the Shadowmoon Valley in Draenor.
2. Head to Moonwillow Peak and find a hollow tree.
3. The bag is near the plaque where Prophet Velen stands, to the right of it.
4. The exact location of the bag is at these coordinates: (/way35.3, 48.9 Buried Satchel)
Satchel 5 (Community Rumor #5)
The fifth Community Satchel is going to be found inside of Netherstorm. You need part members to be able to spawn the dirt mound to loot the Satchel from. The little mages nearby also interact with crystals that you need to channel with your Pyrreth. Travel to the Netherstorm and use the Torch of Pyrreth that you obtained from day four in the Secrets of Azeroth event. One of the crystals surrounding this area. You will see three crystals and a big one in the middle. (/way #109 26.2 68.5 Hidden Satchel)
You have to be channeling all three of these crystals to get the dirt mound to spawn. You need three separate entities; three separate players need to be standing at one of the crystals with Torch of Pyrreth and channeling the torch into these small crystals and then Dirt Mound will spawn directly underneath the large crystal in the middle. Run into the middle and loot the dirt pie. You will obtain your Satchel and put it into your bag.
Satchel 6 (Community Rumor #6)
Move into the Mogu Statue which will be close to the Valley of the Four Winds. Move to the coordinates: (/way #376 56.7 21.4 Hidden Satchel)
Satchel 7 (Community Rumor #7)
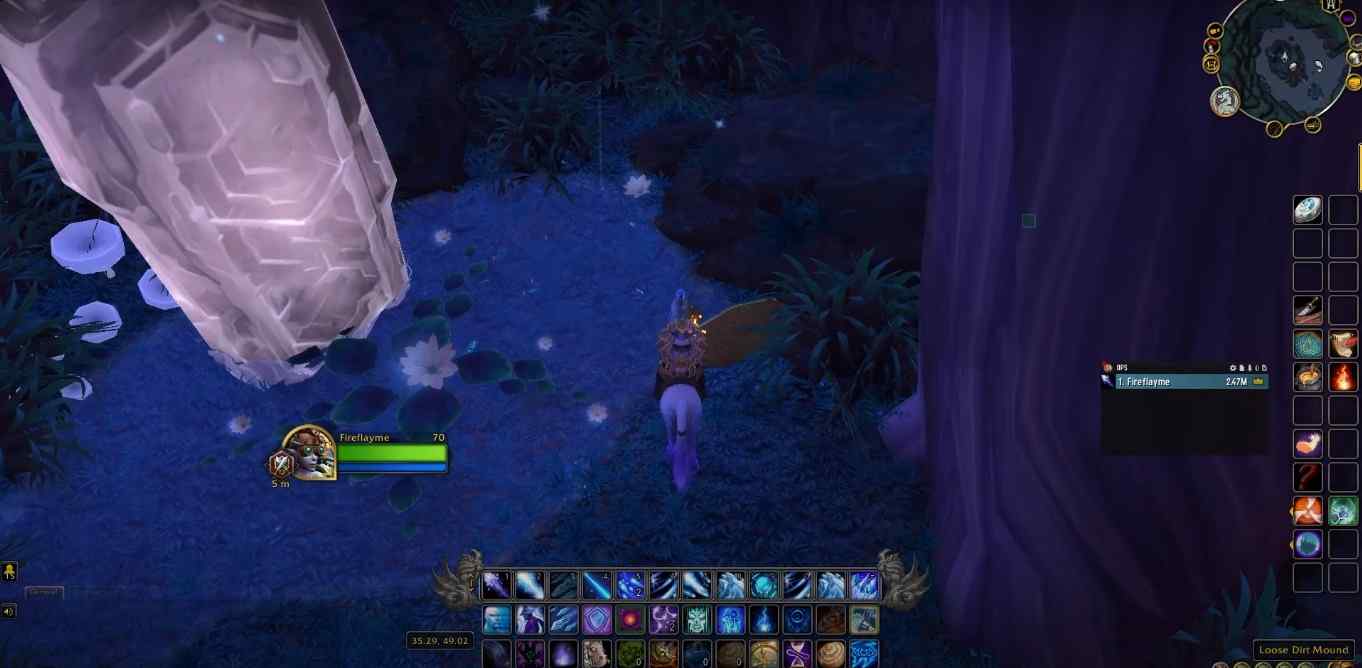
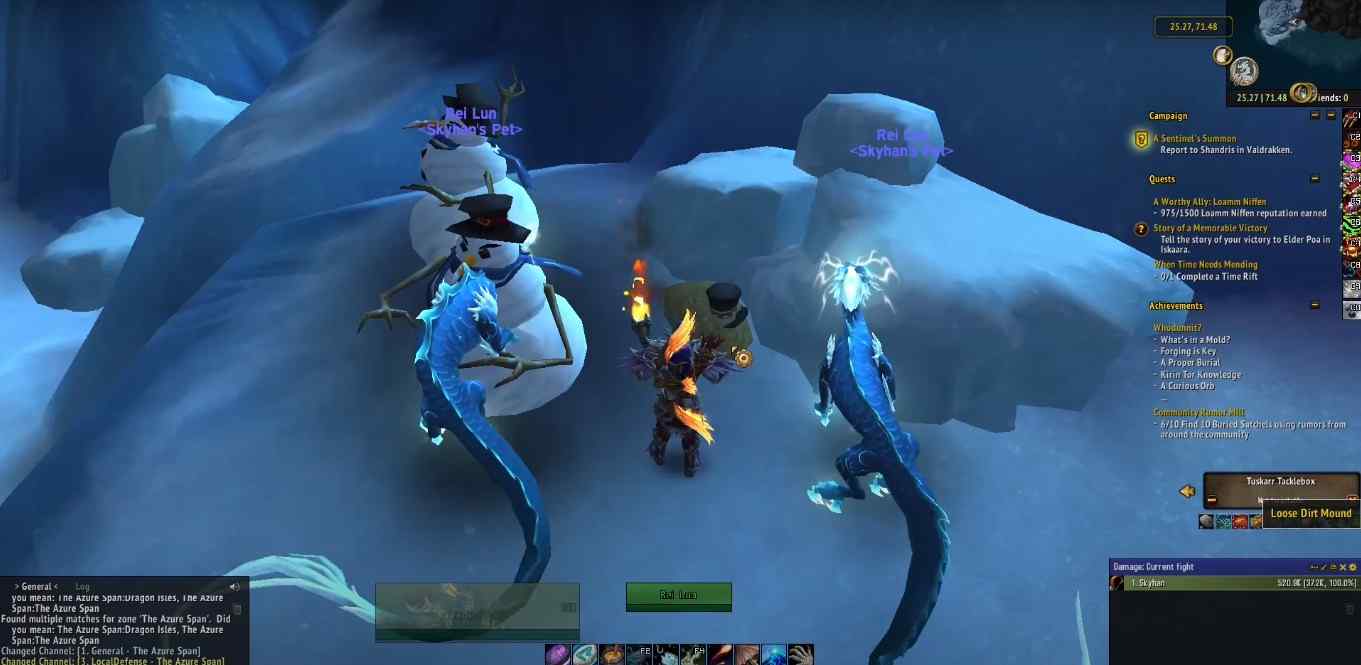
Move into the Azure Span and there you can see the snowmen. To find the Dirt of Mound use the Torch of Pyrreth near the snowmen. You have to head towards the coordinates: (/way #2024 25.2 71.4 Hidden Satchel)
Satchel 8 (Community Rumor #8)
The location close to the Emerald Dragonshrine in Dragonblight is your destination for obtaining the Dirt mound which will be close to the lakeshore. Move into the coordinates: (/way #115 63.9 72.6 Hidden Satchel).

Satchel 9 (Community Rumor #9)
The coordinates for the ninth community channel are: (/way #10 46.0 50.6 Hidden Satchel). It will be located in the Northern Barrens. Find the Dirt Mound on the northwest side of Crossroads.

Satchel 10 (Community Rumor #10)
The coordinates for the ninth community channel are: (/way #17 64.6 55.4 Hidden Satchel). You have to use the Torch of Pyrreth on the crystal to spawn the dirt mound. It will be on the east side of the Dark Portal inside the Blasted Lands. Looking at the achievements, 5 buried satchels from the community rumors achievement gets you the blue tweed cap. 10 satchels will reward you with the Tobias dog pet that was shown during the Secrets of Azeroth Promotion.
How to Obtain Mimiron’s Jumpjets Mount
Mimiron’s jumpjet Mount will be given at the end of the events. Move into the Valdrakken for the first set of Clues. This one is a bit different than the other events because this one you can skip directly over all of it and go and loot the part that is required without finding all of the clues. If you don’t want to do all the little easter eggs and clues beforehand you can simply skip to the last part of this guide and you can Loot the part that is required to build Mimiron’s Jumpjet Secret mount at the end of getting all three pieces.
Step 1
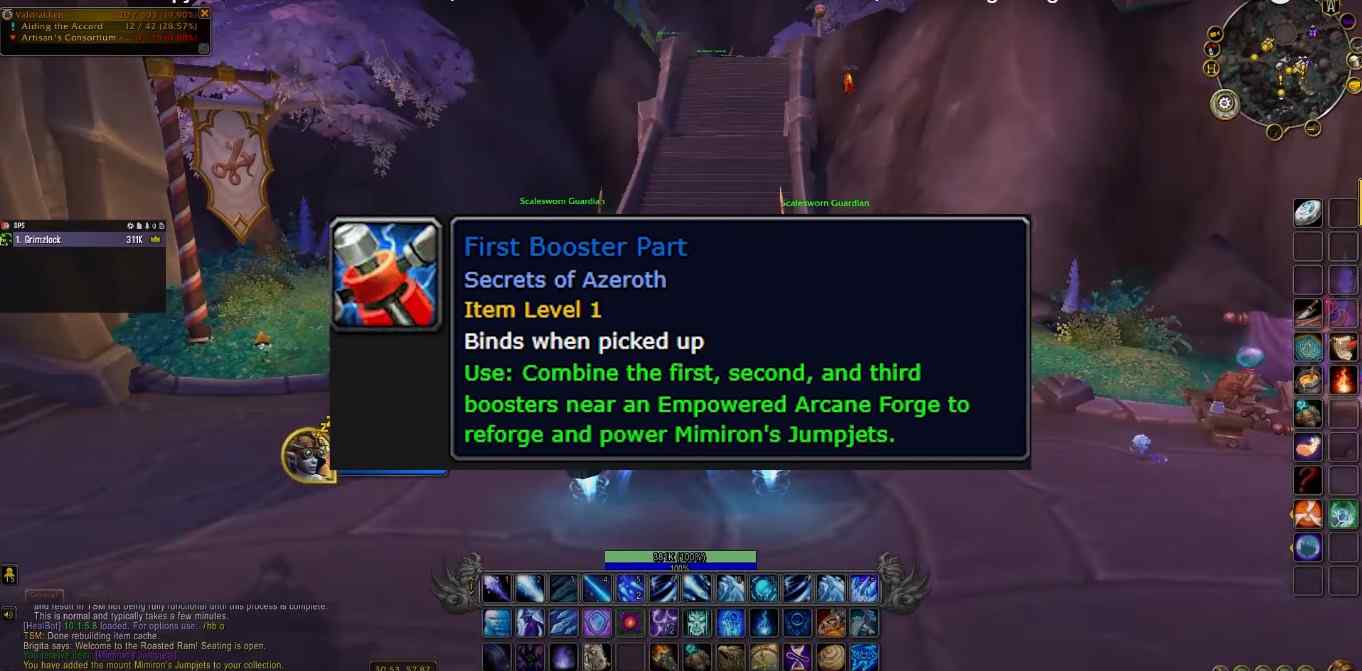
You have to find the First Booster part and you need three of them and they were unlocked day by day. In the Valdrekken you have to go into the enchanting table with Torch of Pyrreth to spawn the first clue. The enchanting table can be found inside of The Artisans market. (/Way #2112 31.1 61.9 First Clue)
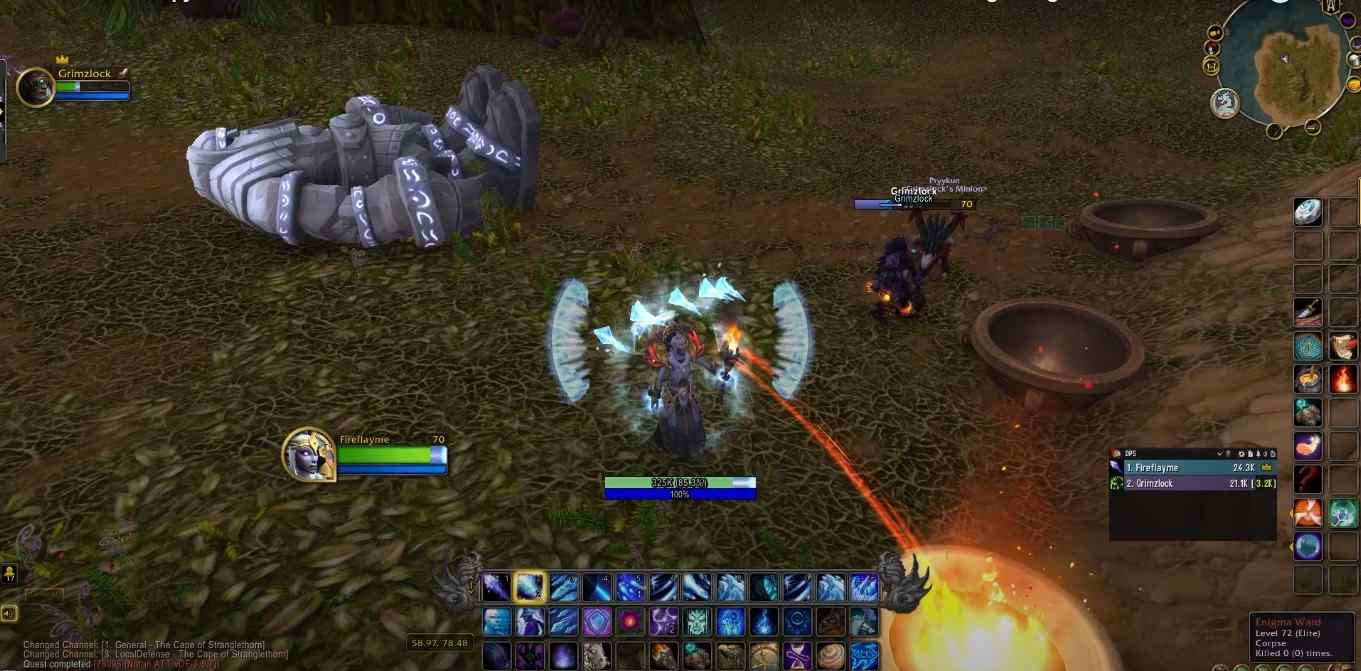
Use the Torch of Pyrreth at the enchanting table where you will see scroll form when your Torch of Pyrreth hits, you will see it immediately on the side. Now head over to the bronze enclave. Use the Torch again by the bonfire to spawn the second clue. This clue will bring you to the Northern Stranglethorn Veil. The easiest way to there for horde is to go to Orgimmar and take the Zeppelin to Strangethorn. Head towards this coordinates (/way #2112 81.6 47.5 Second Clue).
There will be three different clues on the ground. Clicking on the wrong one will send you Spiraling out of control. Click on the center one. If you hover over them, it will say clue question mark for the wrong ones and the right one will say clue with a number the third clue that you are looking for. Go ahead and click directly in the center it will tell you to go to Zul’Gurub which is the dungeon. Move into the Zul’Gurub and there will be a plethora of arrows on the ground that will lead you in the right direction. Move into the Coordinates: (/way #50 57.5 21.5 Third Clue)
Go inside the temple and down the flight of stairs. There will be another pile of Clues. Make sure to click on the right one and it will say light. Head towards the Zanzil’s area. In the Besrker spot, you are going to the left and there will be a fourth clue that says Poobah. Now we have to exit the dungeon. We have all the clues inside of this dungeon and move into the Cape of Stranglethorn to Jaguero Isle which is going to be where Poobah is. Go into this area and there will be three braziers on the ground.
You need three people to trigger this event. You must have three people with Torch of Pyrreth and stand in front of these Braziers to spawn the boss. There can be other people doing this and you don’t have to do this act only if you are lucky. (/way #210 59.4 79.0 Jaguero Braziers)
When the boss spawns, at least hit him once so that you can loot the booster part off of him, Once the Enigma Ward has been defeated. Simply kill the boss after the Braziers have all been lit, he will spawn and kill him. You will then get the Booster part to create the Mimiron’s Jumpjets Mount
Step 2
Head towards the Gadgetzan and you need other people as well to complete this step. You can have three to four people around. You can also skip these steps and directly jump into the last steps. You do not have to find all of the clues. Move into the Gadgetzan to the crashed little rig on the ground. Read the first clue over there that brings you to a thousand needles. There will be a bunch of little clues scraps on top of all the little pillars and needles in this area that give you the code. Each of the letters corresponds to the number of solved puzzles.
Head towards the Razorfen in front of the instant portal. It will have a clue that will take you to the next area. The next area brings you to the Bael Modan which is located on your map in the Barrens. Then it will bring you to the whaling Caverns. You have to go inside and to the bottom by the dungeon entrance. Move into these exact coordinates.
/way #199 41.0 94.6 Razorfen Clue
/way #199 50.1 86.6 Bael Modan Clue
/way #10 41.7 39.3 Dreadmist Clue
Move towards the thunder peak in Ashenvale. It will be on the top of the peak and you can see the giant boss. Fly directly behind the boss and loot the next clue (/way #63 47.9 38.3 Fourth Clue). That will bring you to Bloodvenom Falls in Felwood. Find the fifth clue over there. (/way #77 42.0 46.0 Fifth Clue). Equip the thinking cap and the fifth clue will bring you to the Moon well in whisper wind grove. The clue will be on the top of the moon well. This clue will bring you to the Iron Tree woods (/way #77 44.2 28.4 Final Clue). There you will find a water elemental.
You will need four people in the general vicinity to complete this step (/way #77 50.6 26.0 Water Elemental). Wait for the boss to spawn and kill him. Four people have to get sucked into his Whirlpool which takes a couple of tries. Keep jumping and he will eventually suck you in. Once four people get sucked in, he will end up blowing up and dropping the second booster part. Anyone who is in the vicinity can loot that booster part. You do not have to be a part of that encounter.
Step 3
Head into the Eastern Kingdoms and get over to the burning steps area. The easiest way is to go to Stranglethorn and fly. Once you get into the burning steps. Move into the exact coordinates: (/way #36 60.2 47.7 First Clue). Read the clue and it will bring us to the Deadwind Pass. The second clue is going to be inside of the cave. Move into the exact Coordinates (/way #42 53.0 63.0 Second Clue) to get a second clue and read it.
ALSO READ: WOW NEW PATCH
The Second clue will bring us to the Darkshire in the duskwood which is in the Alliance town. Once you get in there, you will see a picture on the wall over to the left-hand side of the building. Click on the clue which is directly underneath this painting.
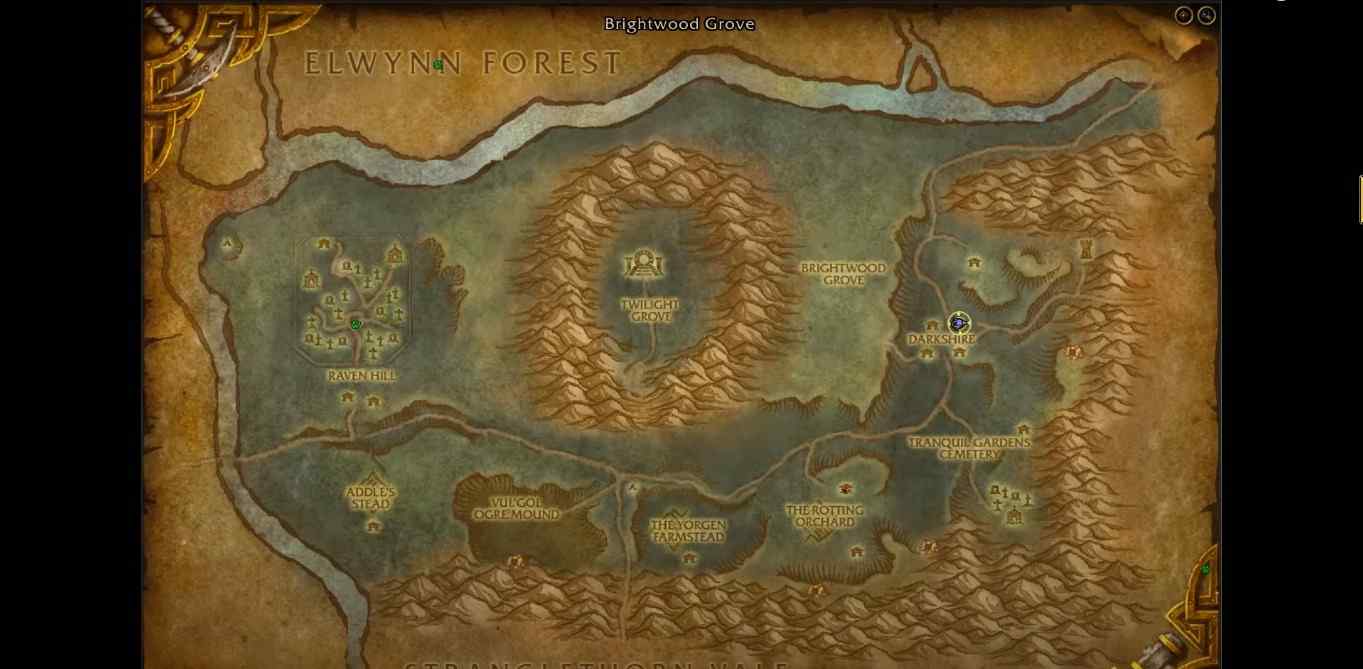
This clue will bring us to Ravel Hill which is located in the Duskwood inside of the crypts. Move inside of this crypt and run back. There will be a tiny little opening in the wall that you have to go into. (/way #47 23.4 35.3 Raven Hill Crypt entrance) Find the final clue which is in this cave that will bring us to the dark portal. Move into the dark portal and fly up to the final destination to obtain the final clue. The third booster part is going to be directly in front of the dark portal in the blasted Lands.
There will be cannons attacking you and cannot get attacked by the NPCs coming out of the portal that are killing other people. You cannot get attacked by those because it is like a 12-second cast time to loot this booster part. Make sure that you kill cannons as they will keep blasting you every time you try to loot the third booster part. Once you finally can loot it, go ahead and pick it up and that’s going to be it for the third booster part. (/way #17 54.8 52.1 Third Booster Part)
Secrets of Azeroth Rewards
You will get the rewards while progressing Whodunnit which is the main questline in the Secrets of Azeroth. Simply solve the clues and get the rewards.
| Rewards | Source |
| Tobias | Community Rumor Mill |
| Thinking Cap | During whodunnit? |
| Pattie | During Whodunnit? |
| Torch of Pyrreth | During Whodunnit? |
| Idol of Ohn’ahra | During Whodunnit? |
| Blue Tweed Cap | Community Rumors |
| Brown Tweed Cap | The Inquisitive |
FAQ
Define Secrets of Azeroth.
Players will be solving 15 clues which will appear in the game every day. Each day there will be a new questline. Your task is to help the Preservationists to find the thief.
What are the Secrets of Azeroth rewards?
The players will get the following rewards.
- A Pet
- A Variety of toys
- Transmogs
- Titles
Players have to solve all 15 days of quests to obtain the Pattie.
How to obtain the Pattie?
The players have to obtain the whodunnit achievement in the Secrets of Azeroth Event by completing the 15-day quest and solving all 15 clues.
What are Community Rumors?
Many players know about the secrets of Azeroth’s Event but not a lot of players know about the hidden satchels that are being found all over the continents of the World of Warcraft. The players will solve the rumors Outside of the game to obtain the Dirt Mound.
When will the Secrets of Azeroth event air?
From the 31st of August till 13th of September, the Secrets of Azeroth will be played.