
Introduction
All maps are equal, but some maps are more equal than others. This is my take on George Orwell’s quote. Because essentially every map is designed for one thing, and that’s to provide a good battleground for players to enjoy the game. But there’s a clear difference between a good map and a bad map.
But that is not binary, no option or number dictates that one map is better than another, it’s a feeling, or a sense which dictates that that this map feels a lot better than the other one, while there are concrete factors which can dictate if a map is good or bad but at the end it boils down how a player feels about the map.
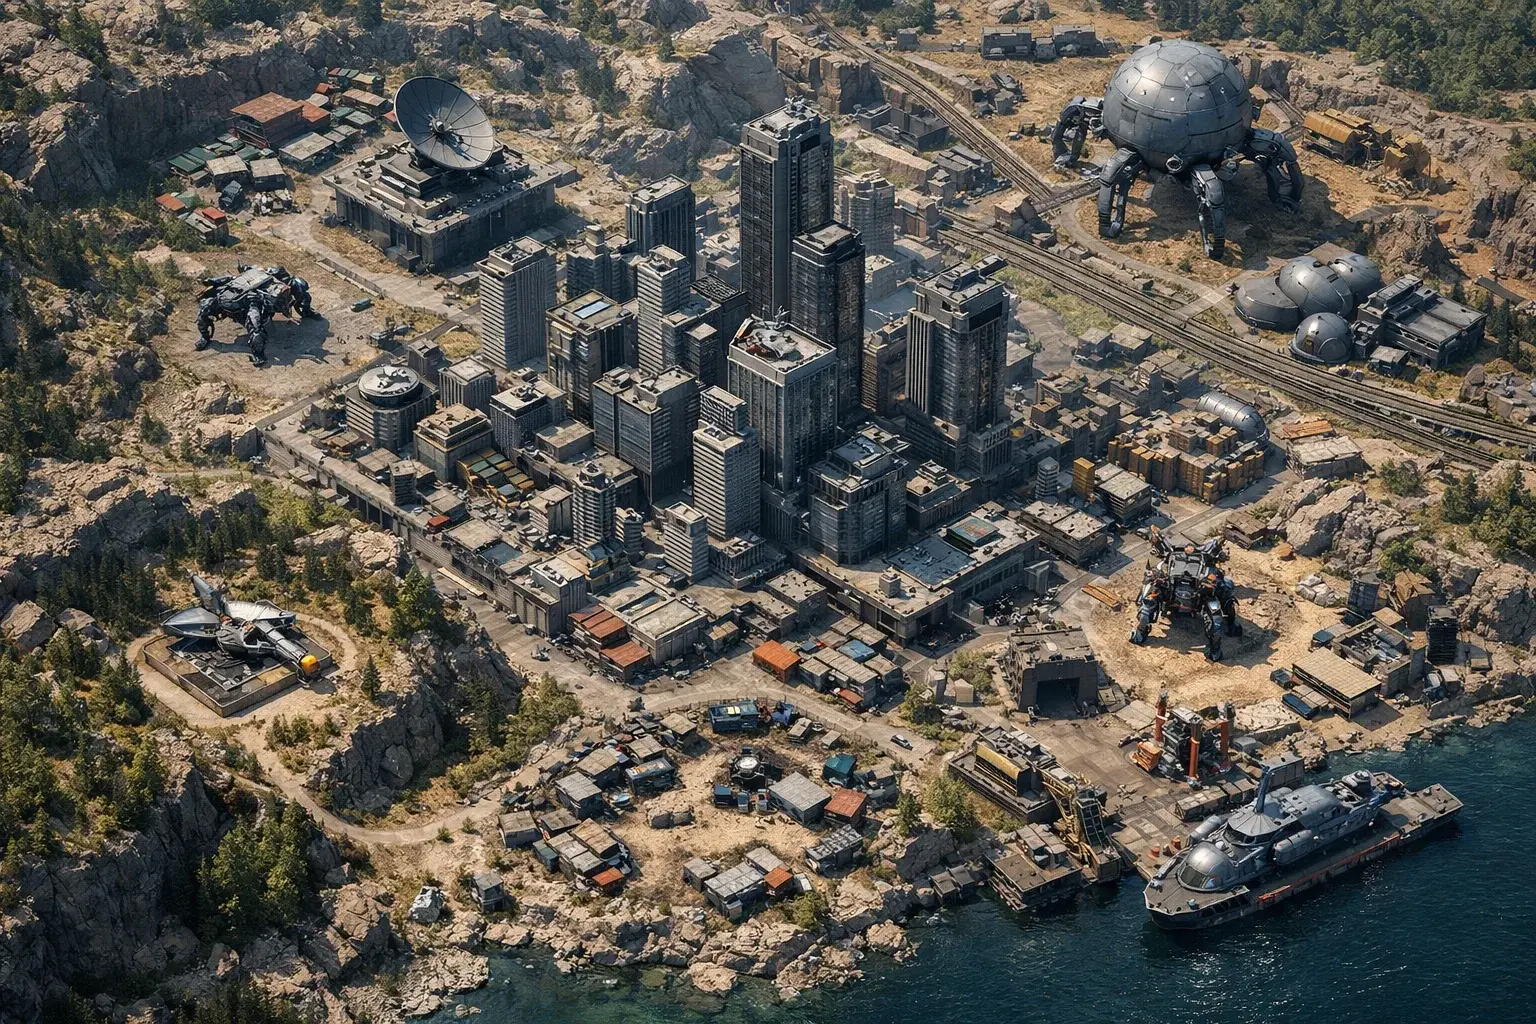
Enough about that, because this map is not a lecture about how to design a good map. Instead, we are going to talk about the ARC Raider’s map, Stella Montis. In this blog, we are going to talk about things to keep in mind while navigating the map, its best loot locations, and best points of interest. At the end of this blog, you’ll know everything there is to know about this map to be good at it.
Before you start:
This puzzle punishes hesitation. If you’re short on resources after failed attempts—or don’t want to risk running it under-geared having extra coins beforehand makes the run far less stressful. You can prep here before committing to the sequence
Related Guides:
- Arc Raiders Expedition Tips Guide
- Arc Raiders Best Maps And Player Experience
- Arc Raiders Skins in 2026
Things to keep in mind:
So let’s talk about the necessary things you need to keep in mind while playing in Stella Montis.
ARCs are tools and not just threats:
You need to use the ARCs and treat them as your companions and not enemies. Let me explain what I mean by that. While the ARCs are your enemies, there’s a way to use them against other raiders to gain an advantage. You can use the ARCs to mask your movement, so they would follow you, which will allow you to distract other players with them. It will also force the other enemies out of their covers because of the Fear of ARCs. So be smart players and use ARC’s behavior instead of just reacting to them
Positioning is better than raw aim:
While raw aim can be a deciding factor in the game, because the better your weapon is the better you shoot is going to matter a lot i am not denying that but your positioning matters a lot because if your enemies can’t see you properly or can’t aim at you properly, you’re going clean sweep them easily and in a game Like ARC raiders which the sole focus is on extraction and not getting the most kills or damage that is a smart choice. So position yourself at a high ground, get into cover, and plant your Exit routes. Winning team fights is more about where you are and how well you take advantage of your position than just the raw aiming ability.


Extraction is objective:
As I said before, extraction is what matters the most in ARC raiders. There’s no need to get 10 to 12 kills in the game; if you’re not going to make it out, you need to collectively know when to engage in a fight and when to walk away. When to do a third party against another Raider squad and when to hide in cover. You need to be a player who has his bag fool rather than has his kill streak maintained.
Sound is as important as visuals:
I say this for every map’s guide: use your sound for your advantage, the enemy’s footsteps, ARC’s hovering, and team fights’ sounds. You need to pay attention to everything because if you know where ARCs are, as well as where the enemies are and where they are fighting, it would be much easier for you to prepare for your escape rather than being stuck in limbo. This will allow you to have a much better strategy than hoping to go into open spaces without anyone being there.
Verticality Is Not Optional:
You should use every advantage you have, and using the verticality of the map is one of them. Previously i have explained why it is super important to have high ground and essentially why it is as important as having a good raw aim. Verticality is that high ground for leverage; it allows you to scope out any areas for ARCs and other raiders, and it allows you to have better angles when fighting against the enemies. All in all, it is just better to use the map’s buildings, skyscrapers, and rooftops for your advantage.
High-Traffic Routes Are Predictable:
Let me explain what I mean by a high traffic route being predictable, because these streets are visible from a mile away, the main road, the rail line, the valley,s and the bridges, all of them are super visible which makes them more susceptible to get attacks from other raiders, the ARC patrols, easier targets for snipers and the list goes on. The point is that you should always take the route that is a little hidden or away from these main streets because that way you’re going to have a better chance of surviving, which is the whole point of the game.
Landmarks Matter More Than the Map UI:
Lastly, in Stella Montis, after playing it multiple times, you should use the map’s landmarks for location rather than just relying on the minimap, because it can be a little misleading, but if you use a landmark, it would be a lot more reliable way to get to certain different locations.
Doing this will help you memorize the map inside and out, and it will also have side benefits like knowing where to pre-aim and where the good loot is. It will also be easier to call because of this, and it will speed up your navigation throughout the map.
Loot Spots:
So without any fluff i’m just going to list down the loot spots of the map and their loot tier.
Stella Montis Loot Zones
| Loot zone | Loot Tier |
|---|---|
| Sand box | Medium Loot |
| Lobb | Medium Loot |
| Assembly workshop | Medium Loot |
| Medical Research | High Loot |
| Cultural Archives | High Loot |
| Seed Vault | High Loot |
What this table shows:
All Stella Montis loot zones categorized by risk and reward to help plan safer extraction routes.
If high-loot zones feel too dangerous every run, timing your entry around ARC patrols and other squads can dramatically improve extraction success.
First-Hand Experience
What We’ve Seen In Live Boosting & Progression:
Players who avoid central roads, rotate vertically, and treat ARCs as movement tools extract more consistently on Stella Montis. Most failed runs come from over-committing to visible routes.
Player Tip
Waiting 30–60 seconds before entering high-loot areas often lets other squads clear ARCs first, lowering risk without sacrificing rewards.
Expert Note
Stella Montis rewards map awareness more than raw combat skill. Players who memorize landmarks outperform those relying only on the minimap.
Frequently Asked Questions Related To Stella Montis Map (FAQs)
What makes Stella Montis different from other ARC Raiders maps?
Stella Montis emphasizes verticality, sound awareness, and landmark navigation more than direct combat dominance.
Are high-loot zones worth the risk on Stella Montis?
Yes, but only when approached with patience, timing, and planned exit routes rather than rushing in early.
How important are ARCs on this map?
ARCs can be used strategically to distract enemies, mask movement, and force other squads out of cover.
Should I avoid main roads in Stella Montis?
Main roads are highly visible and predictable, making them riskier than hidden or indirect routes.
Is extraction more important than kills on Stella Montis?
Yes. ARC Raiders rewards successful extraction over kill counts, making survival-focused play more effective.