Discover everything you need to know about the Sundered Doctrine Dungeon in Destiny 2 and how to complete all three encounters.
Sundered Doctrine is a dungeon in Destiny 2 that takes players back to Rhulk’s Pyramid ship within Savathun’s Throne World. This dungeon focuses on Dread, a new faction of Hive, and their exploration of Rhulk’s experiments. You are required to complete all three encounters, including solving the puzzles and collecting the items from the chest. Defeat Zoetic Lockset and reach the final boss after completing the second encounter. Kerrev, The Erased, is the boss in the last encounter that has a DPS phase, so choose the right strategies and weapons to defeat it. In this guide, we’ll discuss how to complete the Sundered Doctrine Dungeon in Destiny 2, including the best weapons to use for each encounter.
🔥 Check Out Our Recent Destiny 2 Guides
🛡️ How To Get New Exotic Armor in Destiny 2
Learn how to unlock the latest exotic armor pieces in Destiny 2 with our step-by-step guide.
Read Guide🔫 Destiny 2: Complete Guide to Unlock Khvostov 7G-0x
Discover everything you need to know to unlock the legendary Khvostov 7G-0x in Destiny 2.
Read Guide🎯 Destiny 2 Trials of Osiris Guide 2025
Get ready for the ultimate PvP showdown with our updated Trials of Osiris guide for 2025.
Read GuideHow to Start the Sundered Doctrine Dungeon
Before even launching the dungeon, be sure to go to the Tower and talk to Ikora Rey. You can grab the Drowning Labyrinth Quest. Now, open the Savathun’s Throne World and look up in the top left corner for the marker. This will let you launch the Sundered Doctrine Dungeon in Destiny 2.
Encounter 1
The first encounter uses a lens mechanic where you need to light up certain symbols on the walls. Team composition does not matter here, as there is no boss, but there are many subjugators that you will need to deal with. I recommend you bring some burst damage supers and some weapons that are best for killing them. If speed is more your game, an eager edge sword to navigate this area will do pretty well.
Let’s discuss the layout of the area. You’ll have a central room with four branching paths. The team should split into left one, left two, right one, and right two. Left one and left two are connected with a small secret path, as are right one and right two. This allows you to rotate between the rooms without needing to run back. Each one of these rooms contains a wheel on the wall with a random symbol on it. On the wall in front of you, where you first drop in, will be three symbol slots. The symbols are all from the vow of the disciple. Two of them will be filled in, one will be blank, creating a sentence in the form of noun, verb, and noun. You must create a path of light. In this case, a literal light to the missing symbol. There are two ways to figure out the correct symbol. Number one is just some context clues. If your first set of symbols is something like Guardian, worship, and blank, chances are that the final symbol will be something like traveler or light.
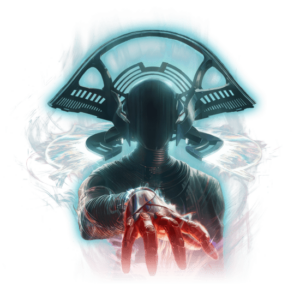
However, number two straight up gives you the answer in the form of the truth speaker. In one of the four rooms in this encounter, there will be a grim enemy called the truth speaker. Killing it will display the symbol you need to complete this sentence. Once you know what symbol you’re looking for, you can start creating the beam of light chain.

Second Encounter
The second encounter technically has a lot of complexity to it, but can be completed in a rather simple way. Team composition should be ready for Boss damage. Anarchy seems to be one of the better choices right now, especially with a bug showing damage on Shers being higher than it is. For normal mode, this shouldn’t matter too much. I have seen Sleeper Simulant, Darcy with snipers, and Anarchy Thunderlord with storms keep Titans. Decent Queen breaker is one of the best weapons in the game. Damage phases have the potential to last a very long time, but you can also make them very short if you want. Radiance is unsurprisingly another great choice here.
Objective
The goal here is to make the boss vulnerable by having them read the kill symbol on one of the four wheels of symbols in the arena. In the section before the boss, you get a taste of how the wheel physically works. One of the seven symbols glows with it. This means that this is the active symbol. To move the position of the glow to a different symbol, you deposit knowledge. This drops one at a time from Wizards, this being the same mechanic from the intro of Vale of the Disciple.
Switch The Direction
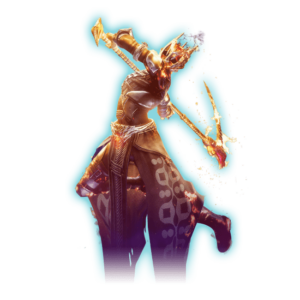
To switch the direction, shoot the darkness switch on top of the wheel. To get access to the encounter, you just need to make the two symbols on the doorway to the right be the glowing ones on the symbol wheels. So, that’s how the wheels physically work. The question arises that what do they do in the encounter? In the room are technically four bosses, but they share a health pool, aka the zoetic lock set. Each one is linked with one of the four symbol wheels in the arena. The leftmost looks at the leftmost, the right at the rightmost, you get it. When each lock looks at each wheel is represented by the meter at the top of your screen. At the very start, the left lock will look at the left wheel. At 25%, the next lock and the next wheel, and then at 50%, and then at 75%. Every 25%, Wizards should spawn.
What are the Events
Here are the events in Sundered Doctrine in Destiny 2.
- The hive symbol indicates that two ogres will spawn, one on the left and one on the right. This is the most punishing event on the board, as the ogres are yellow bar non-finishable boss targets.
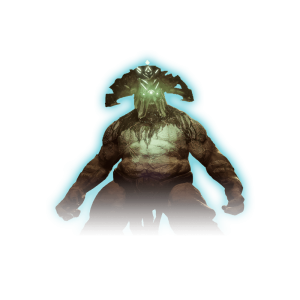
- The brain symbol indicates that extra Wizards and a knight will spawn based on which side the wheel is on. This is the second most punishing event, as the Knight is not tough.
- The commune symbol indicates that the boss’s attack will turn into a set of physical objects that you can shoot down for a set of attacks. This is the third most punishing and is very easily dealt with.
- The stop symbol means that extra enemy spawns will stop. This is the least punishing event; nothing happens. The kill symbol means that the damage phase will begin.
How to Win the Fight
The goal is to lock in the kill symbol into one of the panels, preferably the furthest left, while juggling the other wheels. So that, when you lock in the kill symbol, you have the least punishing things happening to you while you deal damage to the boss. You can try three stops and one kill.
Final Encounter
The final encounter is not nearly as complicated and brings back some of the mechanics from encounter 1. Team composition will likely be similar to encounter 2, where you will want to set up for a regular boss damage phase. However, the boss is somewhat mobile with a small crit spot. So, teams have been opting for Divinity and two damage dealers. Queen Breaker with its new Catalyst has been doing more than enough to take this boss in two phases, thanks to the episode 3 mod particle reconstruction and its buff. Thunderlord spam with two storms, keep Titans was also fun, but very ammo-intensive.
Objective
The main objective of this encounter is to light up or activate the false statement made on the symbol. This is done when the wheel is in the middle of the room while deactivating the true statement on the wheel. This triggers the boss’s Shield to deplete and become vulnerable. The symbol wheel in the middle has six symbols on it, three on the left and three on the right. The left side makes up a statement, and the right side makes up a statement. You must figure out which is the true statement and which is false.
How Do You Change The Glow State
Around this and two other rooms in the area are every possible symbol that can show up in this encounter. All protected by some nodes that can only be destroyed if you have a buff from the Scion dread enemy. The room to the left is accessed by shooting the door with your gun. So, you might want to bring something like an auto rifle to make this a lot easier. The room to the right is accessed by this block that goes up and down when you stand on it.
Defeat the Boss
Once you have the correct glows and non-glows, go up to the center wheel and activate it. This will trigger a room-wide attack where you need to either hide downstairs or behind some kind of pillar to avoid it. The boss’s Shield will slowly drain, and if you did it correctly, it will drain completely. Once it’s gone, you can start causing damage. This is a strand-themed boss, and the boss will attempt to pull you in with a pretty familiar attack. If they are successful and you get too close to the boss, their AOE stomp is damaging and will suspend you for a short time.
