One of the biggest benefits of gaming on a PC is that the frame rates are uncapped. The more powerful your PC is, the higher the frame rate you will get. This is the most significant difference between gaming on a console versus gaming on a powerful PC. Most competitive games benefit from higher fps because high frame rates lower your input lag while also showing more information in a shorter time frame.
This ultimately leads to a far better gaming experience. Another really good reason to choose a PC as your gaming platform is that you could use your existing PC, tweak your favourite game’s settings, and get the best possible performance without spending any money on it.
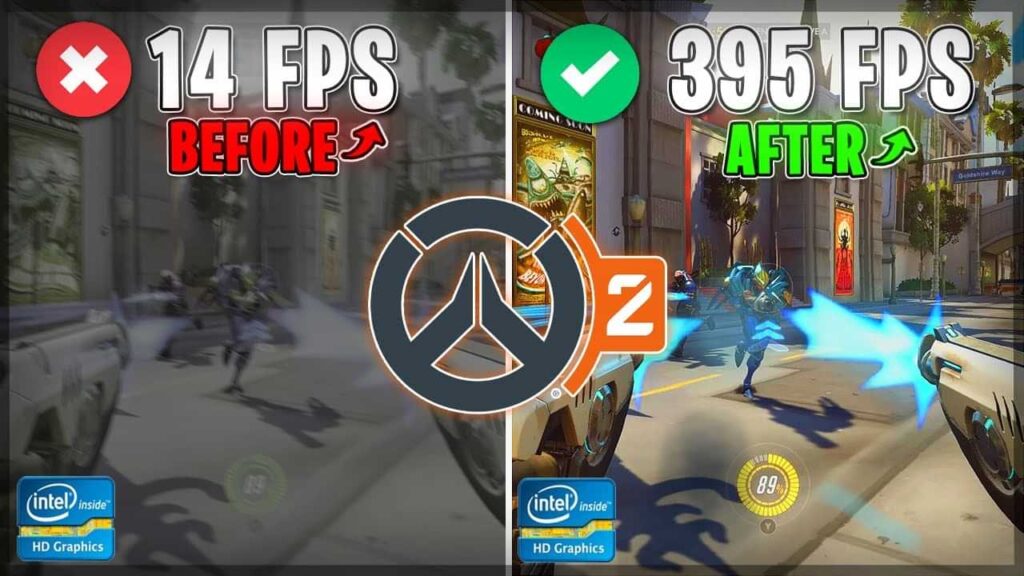
In this blog, I will discuss something like this: I will give you the settings for maxing out your frame rates in Overwatch 2. Since, I am working as a professional Overwatch 2 booster at Immortalboost and I can not afford to have FPS drop at all.
Remember that these settings will only give you a limited boost in frame rate because we are only tweaking the in-game settings and have limited resources in our hands. Now, let’s begin with what settings you should keep getting the best possible frame rates in Overwatch 2.
Overwatch 2 Settings on your desktop:
Before adjusting and tweaking Overwatch’s in-game settings, we need to alter them on our desktop, which forces the game to use them as is. Now, what you have to do is go through your documents folder and find the Overwatch folder. After seeing that folder, click on it and look up this file: “Settings_v0”. Right-click on it. Now press CTRL + F and search “[Render.13]”.”
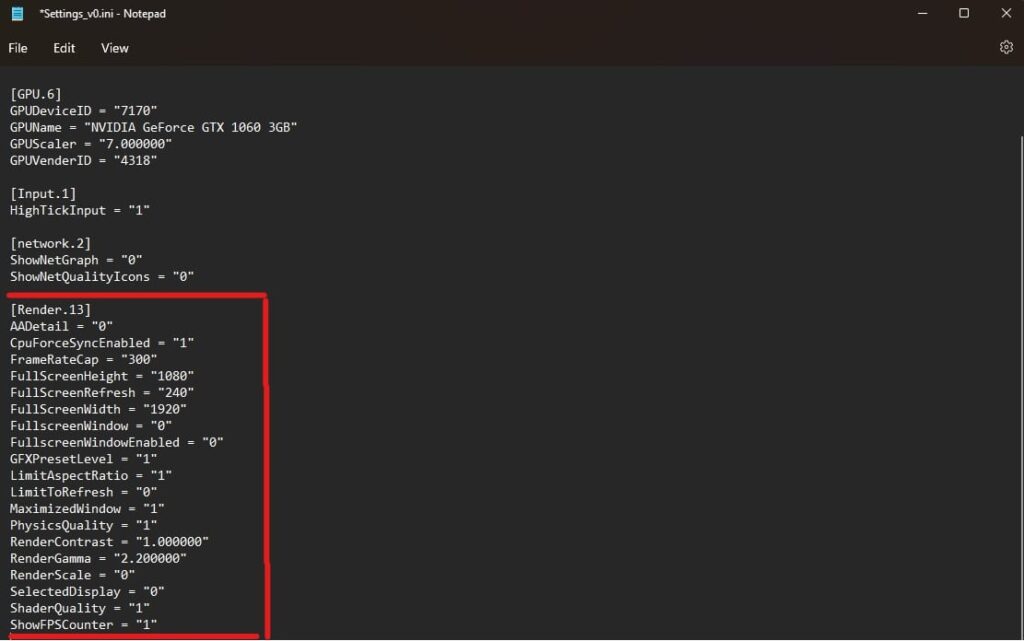
After that, copy and paste these commands.
AADetail = “0”
CpuForceSyncEnabled = “1”
FrameRateCap = “300”
FullScreenWidth = “1920”
FullScreenHeight = “1080”
FullScreenRefresh = “240”
FullscreenWindow = “0”
FullscreenWindowEnabled = “0”
GFXPresetLevel = “1”
LimitAspectRatio = “1”
LimitToRefresh = “0”
MaximizedWindow = “1”
PhysicsQuality = “1”
RenderContrast = “1.000000”
RenderGamma = “2.200000”.
RenderScale = “0”
SelectedDisplay = “0”
ShaderQuality = “1”
ShowFPSCounter = “1”
ShowGPUTemp = “1”
ShowIND = “1”
ShowRTT = “1”
ShowSystemClock = “1”
TextureDetail = “1”
UseGPUScale = “0”
WindowedHeight = “737”
WindowedPosX = “985”
WindowedPosY = “-18”
WindowedWidth = “738”
WindowMode = “2”.
While most of these settings are self-explanatory if you are a seasoned player, if you are not, here are some explanations of some commands. The FullScreenWidth and FullScreenHeight are your in-game resolutions. If you don’t want to use 1080p, you could change them. You should also change the FullScreenRefresh to your monitor’s respective refresh rate.
Overwatch Settings In-game:
We need to modify two in-game settings. The first one is video settings, and then we will adjust graphics settings.
Video settings:
- You can set the resolution of your preference, but 1680X1050 is the best one because it gives you a nice little boost in performance while also giving you excellent picture quality.
- Set the Field of view (FOV) to the highest as it increases pov. The higher it is, the more surroundings you will see.
Graphics Settings:
We have already modified most of the graphical settings in the first, and now we just have to enable the settings that lower our input latency. So, if you are a user of Team Red AMD, right-click on your desktop, go to AMD adrenaline, add Overwatch in the gaming section, and enable the low latency mode from the software.
If you use Nvidia, you will see Nvidia Reflex in the game’s graphics settings. Enable it, and you’re done.
Windows Settings:
Now, we have to tweak Windows to free up our PC’s resources so we can allocate them to our game.
Ultimate power mode:
Firstly, if you have yet to set your PC’s power plant to its full potential, you are losing performance for no reason. Click on the Windows icon, search for cmd, right-click on the application, and run it as administrator. Now Put this command “powercfg -duplicatescheme e9a42b02-d5df-448d-aa00-03f14749eb61”. Now your PC will use more power to boost your PC’s speed.
Real-time priority:
In this step, we have to make Overwatch 2 a real-time priority so our computer can allocate all of its resources to the game.
- Launch Overwatch 2 and wait till it gets to the main menu.
- Now press alt + tab or CTRL + SHIFT + ESC at the same time.
- Right-click on the taskbar, launch task manager, and locate Overwatch 2.
- Now right-click on it and click on Go to details.
- After that, right-click again on Overwatch 2, select “Set Priority”, and put it on real-time.
And you’re done.
Disabling unnecessary programs:
Now we have to turn off programs that we don’t use while gaming, and we also have to turn off hardware acceleration on programs that we do use while gaming, like Discord and TeamSpeak.
Here’s what you need to do.
- Go to Task Manager and click on Startup. After that, turn off any program that you don’t use often.
Now, we have to turn off hardware acceleration on programs that we use while gaming.
- Discord: Go to user settings and scroll down until you find the “Advanced T.b” “In that tab, you will be able to find a switch for hardware acceleration. Turn that off, and reboot your application.
- Spotify: Click on settings in the top right corner. Scroll down until you find a switch for hardware acceleration, and turn it off. Then, restart your application, and you will be good to go.
That’s it. You’ve adjusted your game to be optimal. The only thing left to do is mix and match video settings to find out which one you like the most.