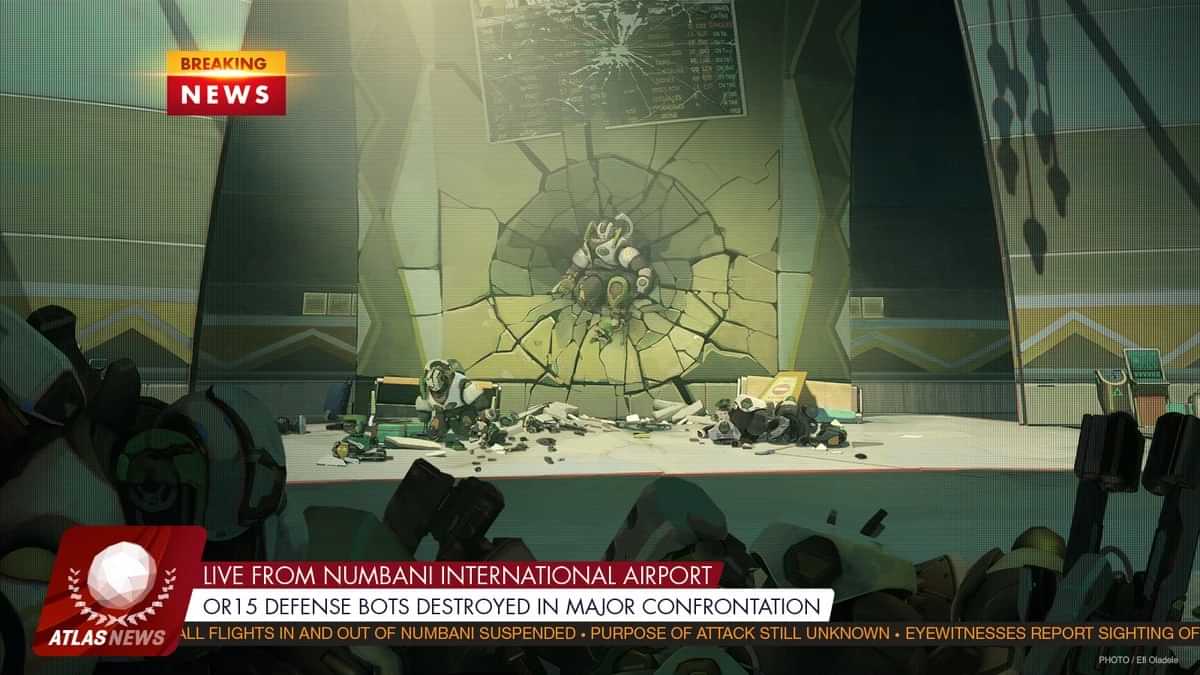
Numbani is a Hybrid map in Overwatch 1 & Overwatch 2 (Check out the difference between both here) and is one of the first 12 maps included in the game’s release on 24 May 2016. Numbani is an absolute sniper’s paradise, there are overlooking walkways and balconies, and sneaky little hidden holes to duck into galore. Hanzo and Widowmaker will excel here, and some of those good sniper positions can be reached by Torbjorn and Bastion, for setting up turrets and switching to stationary mode.
Source: https://overwatch.fandom.com/wiki/Numbani
Since I am working with the SR elo boosting squad here at Immortal Boost, I have to stay updated so that I can perform my job better when my client asks me to play any hero or just for high KDA they ask me to play tank heroes or support heroes only. Today, we’ll discuss the Numbani’s lore, known locations, objectives, tips for defenders & attackers, and much more.
Numbani Lore
Numbani is one of the few places where Omnics and humans live as equals and is also known as the City of Harmony. Since its establishment after the end of the Omnic Crisis, the collaboration has led to the creation of one of the world’s greatest and most technologically advanced cities in a short time. It is a utopian city on the edge of the African savanna, somewhere near Nigeria.
It is one of the world’s foremost centers of scientific discovery, and exploration, and a peaceful city, leading the world in commerce, biometrics, nanotechnology, and education. Numbani is a hybrid map, so first you have to capture an objective before you can unlock the payload to move it toward victory.
Known Locations
Here are all the known locations of the Numbani map in Overwatch 2.
- Adawe Avenue
- Numbani Airport
- Adawe International Terminal
- Kọfị Aromo
- Chez Tajine
- Chancellor Hotel
- Robochalet
- Alatise Parkway
- 4127 Alatise Parkway
- Bello Tower
- Concord Station
- Heritage Avenue
- Unity Plaza
- Aetria
- Axiom
- Cultural Center]]
- Gallery Enlight
- Sigma Bot Couture
- Bankolé’s Grocery
- Numbani Heritage Museum
- Museum Station
- Museum Information Center
- Peace Park
- Tiawo Boulevard
Objective A) Capture the objective.
Be mindful that the map is amazing if you are playing a sniper, try to take the path less traveling to get through to this first objective. You can duck into the left of the spawn point building and from there, you can get past the first balcony a Widowmaker could set up in, or up onto the catwalk any turrets might be set up on.
Without putting you in danger from any possible snipers set up along the route, as well as avoiding one of the most often set-up choke points just before the objective, when you jump down from the catwalk you can quickly duck into another building that will lead you right up to the objective itself.
You can also move around behind the building, but that will put you in line of sight for longer when you do move out at the objective in Numbani. To get onto the catwalk surrounding the objective, you can take the building and run straight through and up the stairs. You will be behind the team from this spot to clear out any defenses they have set up looking at the objective.
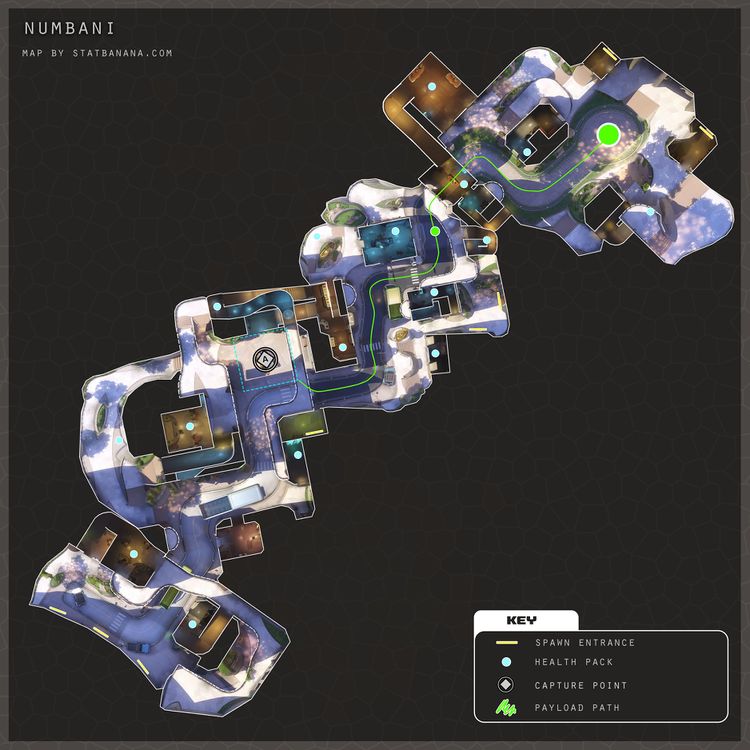
Objective B) Escort the Payload
You’ll need to move it through the streets, there are again a lot of balconies you will be passing that need to have an eye kept on them as you go, once you have captured the objective. In the final push to the courtyard is fairly open, you are playing a tank it may be hard to stay on the payload itself.
For the crucial push to that final objective, check the building on the left-hand side and you can again sneak behind the obvious line of sight and possibly get behind the team. Moving the payload is the easy part of this map compared to the fight for the objective in the first place.
Tips for Defenders
When playing defensively at the first section of the map, instinct may have you trudging forward to cut off the attackers before they can establish themselves at the actual payload. This is a mistake, as their spawn point is closer, and when you meet your end, you’ll have to trudge back to the defensive position at the payload.
Instead, remain at the payload and utilize the building directly in front of the payload with Torbjorn’s turret or Bastions Sentry form. The scaffolding directly to the right of the payload is also quite useful, as it provides a vantage point for the streets, the hallway that the attackers can use for flanking, and a second flanking position; a back alley that can take up to that vantage point.
Tips for Attackers
If you’re attacking and the defensive team has stationed themselves further up from the payload, you can easily take them out using the various buildings to get around them and eliminate them or move past them. It’s best to take the back route described above that leads to the higher-level area, and a point just behind the payload, once you reach the position where the payload will be.
This will be helpful for you to deal with whatever is in the building opposite the payload and to eliminate any snipers or Bastions on the top level, all while flanking the majority of the defensive team. Taking the main path can lead to a quick elimination as this is where the majority of the opposition’s fire will be focused. You can also use the upper level of the building directly in front of the payload if you have a hero with a traversal ability.
Pro Plays
Tip # 1
The second area strongly favors the attacking side, and the defensive measures will be far more difficult to implement. Using a mix of long-range to cover the streets, and short-range to patrol the buildings is vital. If you are on the defensive side and are beaten back, you may have an opportunity to defend just before the checkpoint, but given it has a ton of entrances and flanking opportunities, any defense you set up will be a quick target for elimination.
Using Symmetra Turrets on the pathway will help to slow the opposition to a crawl, especially if there’s a unified assault on the attackers, but it’ll be incredibly difficult to hold them off here.
Tip #2
The attackers will be much better off here, and with the aid of a Reinhardt at the front and some Soldier:76 or McCree’s you can push through to the next checkpoint with ease. You must cover your flank here, and use it to your advantage, as the defense team’s strategy will likely culminate in a final defense just before the checkpoint, where they will have easy access to higher ground and a clear view of a final chokepoint.
To place the attacking team completely behind the defense, there’s also a path to the left of the street that can be utilized by every Hero. Use this to circumvent the defense if you’re facing a unified assault.
Tip # 3
The narrow choke point situated directly after the second checkpoint is incredible when a unified defense team coordinates appropriately. In Numbani, it’s a pathway that must be traversed by the payload and the enemy team, so you need to aim over there. There are also two flanking points directly around it, to the right and left, which if not properly watched can lead to a dismantling of your defenses. Junkrat is great here, as his steel trap can stall enemies hoping to take the right flank, and his grenades can hold off multiple enemies in the tightly packed tunnel.
Tip # 4
There is a second checkpoint that offers an equally devastating advantage for the defenders, with a building to the left of the payload that can be filled with traps or high DPS close-range skirmishers, when your defense is broken through. The only major flank you will have to deal with from this point until the final objective point is the flank that exists to the left of the payload that can let the opposing team circumvent the defense and start attacking from the backside. Cover this point with traps and keep an eye on it, or the attackers can easily take out multiple members of your squad.
Tip # 5
You can use an agility-inclined hero like Hanzo, Genji, Widowmaker, or Pharah, to reach a room on the right of the tunnel, above the bulk of the fighting, only if you’re attacking this section and can’t get past the defense watching the tunnel. You can then drop down behind the defensive lines and begin eliminating them while allowing the rest of your team to push the payload forward.
Tip # 6
You can use the path to the left of the payload’s main trajectory to bypass the bulk of the defensive team, once you’ve pushed through here, and forced the defense to fall back. To focus their attention on pushing the payload forward, you’ll still need a couple of heroes. You can begin to denudate the defense’s final prospect for staving off the assault’s deliverance by separating from the pack and using a close-range dominator like D.Va.
Hope you enjoyed reading this! Stay updated for more guides.