Hey everyone! Today, I’m going to discuss Conduit, the new Apex Legends hero added in season 19.
She is a support legend with an interesting kit and a tactical ability. Since I’m a Predator Top 500 rank Apex player working with the Apex Ranking Boost service team here at Immortal Boost, I need to know how to play every legend so that if clients ask me to play a specific one, I should be ready.

Today, I am going to get you on your way to mastering Apex Legends Shield healer conduit. Conduit is a good hybrid of being offensive and defensive at the same time. She is the only support character in the game who really fits this. She is the first active support Legend in the game and what I mean by active is that you can still support your team without being held back in some way. I will discuss a lot of tips, tricks, and gameplay examples.
Squad Role
If you are unsure about Conduit’s general role or play style, she has one of the most unique kits and sets of abilities in the game. She not only heals herself but can also heal others, control the battlefield with her ultimate, and even have some movement or assault properties through her passive and tactical abilities.
If you want to be a team player but not completely foregoing the ability to make plays then Conduit is the perfect pick. She is a support Legend which allows her to open that extra compartment on blue loop pills plus also gives the squad the ability to craft teammate’s banners.
Abilities Overview
The conduit has a passive movement speed boost, a tactical that can heal the Shields of herself and her teammates, and an energy Barricade, which is her Ultimate ability and allows her to control the battlefield via Deployable Shield Jammers.
Savior Speed (Passive Ability)
The weakest part of her set is going to be her passive voice, but it does have some unique cases that are worth mentioning. Savior’s speed does give Conduit a 20% to 25% or so speed boost when friendly teammates are outside of the range of her tactical ability, which is 50 meters. It does take 3 seconds for that boost to activate. Once it is activated, the ability will stay up unless you break either condition of no longer looking in the general direction of your teammates or you do get within 50 meters of that squad member.
Note that abilities like Mad Maggie speed nodes from her ultimate will not stack with the effects of her passive. If you are wondering how far you might be from a teammate that you want to run to, the big thing to note is that if the icon on your friend is a Shield icon this means you are within 50 meters as the Shield icon is a trigger to conduit tactical.
If the icon is not there, you are outside of 50 meters, and you will see a three-arrow or Chevron-looking icon. Before jumping to the tips right off, keep in mind that if you are an Apex player who is newer or maybe a little slower and having a difficult time keeping up with your team, then her passive ability is going to be so good for you, as this speed boost will help you catch up and not just bad squad mates.
Tips for Passive Ability
If the squad ever needs to run back to get ammo, maybe pick something that was left behind, or get a knocked-out teammate’s card, then Conduit absolutely needs to be one to do this, as she will help by saving time or minimizing the amount of time that you are away from your team.
This can also apply to having Conduit loot longer off the drop and having your teammate rotate earlier to ensure better that you get positioning or beat others to the rotation. If one of your friends does end up getting eliminated in the game but you manage to win that specific fight then having Conduit run to that adjacent POI to do the respawn is a very viable strategy.
When it comes to actual gameplay or ways to use the Conduit passive ability in terms of combat then there isn’t a whole but there are some specific ways you utilize it depending upon what you want to do for the team.
The most logical one is to have Conduit as the team’s anchor. This allows Conduit to hold up and control a specific location; if enemies do get too close, she can use her ultimate ability. However, if your team is maintaining the front line, showing presence, and controlling a larger portion of the map, then the conduit’s passive can start to shine here. She can quickly abandon that anchored spot and push up to help the team.
The second is effective because since she gets more speed, she can patrol the perimeter of an area. If danger or enemies do come from a different side, then she gets that speed boost to retreat back. Either way is going to be viable, as it depends upon what you want to do or the skill level of that Conduit player.
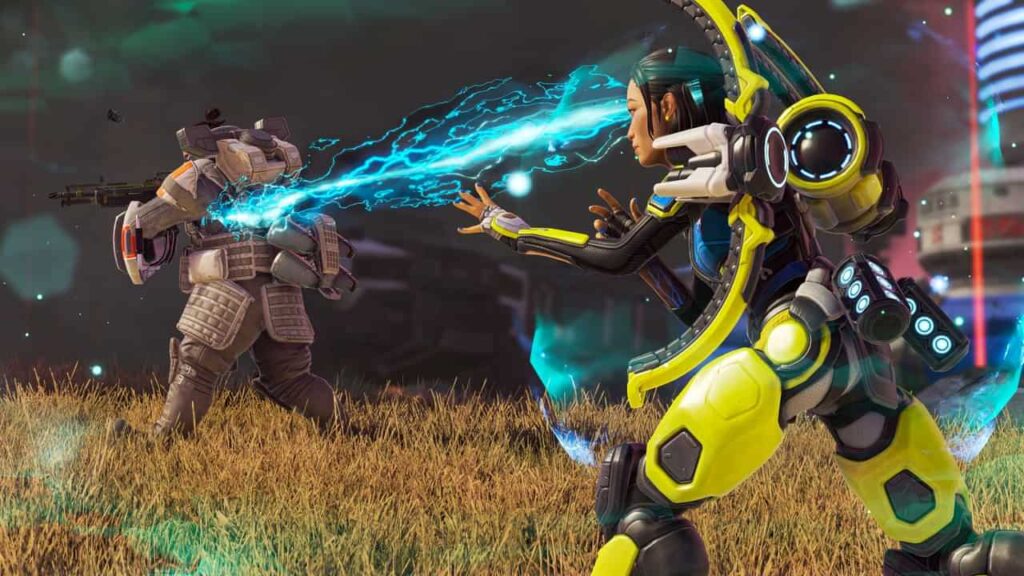
Radiant Transfer (Tactical Ability)
Where things get really interesting is going to be Conduit Tactical ability which is radiant transfer. There are a lot of ways to use this ability, but for starters, the ability will apply temporary shields to both friendly teammates and both conduits themselves. The application and effectiveness of this vary per player as teammates recharge all their shields with temporary shields, whereas conduit only gets a flat 64 shield recharge.
The ability is also applied much faster to teammates at a rate of 16 shields per second over 8 seconds whereas for conduit it takes longer just to get half the shields as she gets eight shields per second over that same period of 8 seconds. This does mean that the ability is meant more for team support rather than just conduit getting a quick health replenishment, which she wants, which would be overpowered.
We discussed earlier that the tactical range will be 50 meters, and friendly teammates do not need to be in visible range, as shields can be applied through the walls.
Type of Phases in Tactical Ability
There’s going to be what I deem to be three phases or four phases of this ability when you are using it. There is the charge up which lasts for 8 seconds. This is when the shield icon on your screen with a lightning bolt. However, the first 4 seconds of this phase are only going to be when you can apply the tactical to other teammates. After the four seconds, you can then kind of go 1b phase where the shields continue to charge up.
Phase 2 or the active phase is going to be where you have temp shields for 20 seconds and then the degradation or drain phase at the end which is going to be around 2 seconds and this is where the temp shields start to wear off. Since the total amount of time that you have the shields is 20 seconds and the ability itself does have only a 21-second recast timer that starts right after that the end of the 8-second charge-up phase. You can virtually give teammates temporary Shields forever.
Tips for Tactical Ability
If you do get shot during the temp shield’s initial charge-up phase, the charging will stop overall, reducing the tactical’s effectiveness. Now, if it’s not continual damage, the shields can start charging up again, but if it is beyond that initial charge-up phase with a lightning bolt, you are capped out on how many temp shields you are going to get.
While everything so far is essential, what you need to know is that when it comes to keeping your squad alive is that it can be quite taxing to continually look at the player’s cards in the bottom left corner and then look for the teammate in the center of your screen. You’ll still have to do it but you can reduce this by understanding what the icons on your friends mean. So you can more quickly and easily apply temporary shields to players who need them.
The grey shield icon means that players have full shields. The yellow icon means that they are partially weak but still above 50%. The red icon means that your teammates are critically wounded, so they have 50% shields remaining or are completely out. Keep an eye on those red icons, as they will really tell you if someone is badly hurt. There’s also a green icon, and this is going to be when your squads are getting a temp shield applied to them.
In addition to understanding the icon, you do not need to be looking at teammates when you do start to use Tactical. If you are in a close-range fight and aggressively running away or getting around a corner then doing the typical combat stuff you can start the activation and then look and pan around to your teammate, the effect will automatically apply to them when they do appear on screen or when that icon pops up on that character. This is just another way to react to and keep the team up more quickly.
When an enemy encounters you, the first instinct for any good player is to always take cover and apply shields. It just makes sense until you get conduit on the team. It’s hard to train yourself to learn this, but my next tip is arguably the most important thing in this Ultimate Conduit guide, as it applies whenever you are either playing as a conduit or even if you are playing with one.
Anyone who gets the beneficial effect of those stem shields is essentially getting a completely free battery. Going straight into using your own shields to refill or override the temp shields is absolutely just a waste. Once you get the temp shields, you have 10 to 15 seconds to make a solid attempt at a push play or maybe a counter play.
If you are encountered again, you can now apply shields. If you are unable to do anything within those 10 to 15 seconds, then I would not rush it, as you are almost out of time. Just apply some shields to override conduit tactical. This is very important, and it does mean you are going to have an extra dozen or even two dozen batteries a game, which can add up if you are in a slow-ranked game.
If you want to apply any sort of heal while the tactical is charging up or you already have the temp shields, you should apply a med kit or health heals, as this will give you double the amount of heals and half the amount of time required. You can also use the tactical at the same time as you are popping a med kit, healing item, or throwing a grenade.
In my opinion, the tactical is one of the most powerful abilities, at least for a tactical in the game. It makes Conduit a prime candidate to get the gold helmet and change that 21 recast timer to just 16 to 17 seconds, which is a big deal as you kind of just skip that drain period.
Energy Barricade (Ultimate Ability)
Conduit ultimate is the energy barricade and this allows her to deploy a field of jammers to slow down and damage enemies who are caught inside of their 10-meter radius. Conduit can deploy or shoot these jammers up to 80 meters away on level ground and for the most part they deploy in a horizontal line covering a large portion of that battlefield. It takes about 4 seconds for the jammers to activate once they come in contact with the ground and they last 60 seconds before disappearing.
The Conduit’s ultimate does have a 2.5-minute recharge which starts as soon as you deploy the jammers. You will only have 90 seconds of downtime. This also reinforces the fact that the gold helmet on Conduit is essential, not just for a tactical but also for her ultimate ability so you can have as much coverage and control as possible.
Tips for Conduit Ultimate
The most typical way to use the ultimate is going to control areas with a basic deployment. This can be to cut off enemy advancements or enhance yours. Using this energy barricade in a defense makes the most sense but since the jammers do deploy in a large horizontal line, you can then launch the jammers past to building, rock, or any structure and this is going to stop enemies from getting a quick escape out the back. This will give you the needed time to push up and take a fight.
If you’re looking to play slower and more defensively in ranked then the Jammers are OP when it comes to slowing down late rotation teams. Slowing enemies down when the ring is at their back can be a huge problem if they do not have any sort of movement to get over the Jammers. You can also use the jammers as an anti-third-party tool.
Deploying the Jammers to the side or in any direction that cuts off an enemy squad that might try to rotate in can be a very powerful way to let you more freely take out one team at a time. This will slow enemies down long enough for you to eliminate that first squad, loot up, and prepare for the third party that is coming in. Note that this is very positional dependant and as always being faster to take a fight and finish a fight is going to result in the best payoffs.
Conduit ultimate is not going to necessarily catch on to any surface, so if there are any surfaces that they might not be able to stick to then they are just going to bounce off. This a very noticeable by deploying the Jammers inside and this does lead us to the technique of controlling smaller interior areas. You will not be able to cover or cut off as much ground but being able to deploy the Jammers in a panic situation on the interior means enemies can’t do anything or they are going to take damage, get stunned, and slow down.
One problem with deploying the Jammers in smaller spaces is that they kind of bounce off of one another and they are going to get broken, so try to deploy the Jammers in the center of rooms for the best success and to not waste part of the ultimate.
How To Use Ultimate Effectively
There are going to be a couple of ways to launch or deploy the ultimate in a way that results in not just a straight line. If you look straight down then this is going to launch the Jammers into the flying V formation rather than the line of Jammers being perfectly horizontal. This bends the line into a cone formation in front conduit. This can be great if you are pushing into an area and you need immediate relief in front of you.
There is not the most control with this but if you do look slightly up from straight down then you will widen that V and this can result in you just controlling a little bit more space such as creating a pocket of protection between the building and the Ultimate Jammers. This technique of looking straight down is also good to deploy if you are getting chased as in some ways it’s like Bangalore but more directed at your specific location.
If you do look straight up into the air then the Jammers will get even larger spaces between them but it’s to the point where they create gaps in your wall. I don’t necessarily see this being useful but if you do want to give the impression of covering the larger area then this can be good. As long as you will be looking to the ground then the Jammers will be used in a way that does let them be appropriately spaced.
If you are in a pinch with little to no cover around you then try to assemble and use the Jammer as a small amount of protection sticking close to these is going to work best in close-range fights as they might make just enough difference to keep yourself alive.
How to Counter Conduit’s Ultimate
There are few counters to her ultimate. Let’s start with an easy tip to counter Conduit Ultimate. The Jammers have 250 health and you can easily shoot and destroy them. Although this might be just enough to slow down enemies, it can allow you to make counterplay.
The second tip is going to be a typical counter of Crypto’s EMP and this is probably the biggest one to be mindful of.
The third way is going to be Ultimate of Wattson. The pylon will not stop all Jammers, but it will break any that fall within its radius, much like a normal grenade.
Rampart and Newcastle also have concrete counters. If a fully amped wall blocks the Jammer’s line of sight or path to you, Rampart can sit inside the little pocket even if it is inside the Jammer’s radius. This is also going to be the case for Newcastle’s tactical mobile shield.
Note that you can destroy the amped portion of rampart walls and it is going to no longer protector.
Legend Combos
For sure, Revenant and Conduit are very powerful. Conduit is an all-around smart and unique type of legend to have and play to date. A better edge competition would be with Bangalore or Bloodhound and Valkyrie or Pathfinder. Bloodhound due to abilities leading you to squads both through abilities and beacon, Pathfinder provides you zone beacon, and both Pathfinder and Valkyrie give care pack scans (free EVO), and squad rotation mobility necessary for edge comps. With the reduced grenade damage perk and double jump pad, Octane would also be acceptable.
Best Conduit Weapons
Normally I would suggest something like a Marksman rifle and a shotgun as a support rifle but Conduit can be super aggressive at times, so I do recommend more aggressive Loadouts that fit her a little bit better. For this, you are going to want to run an Assault rifle and an R-99 SMG.
When it comes to the assault rifle, the three main choices are definitely going to be Flatline, the hemlock, and the nemesis. I don’t recommend a Havoc because it doesn’t really do better in the medium range. If you don’t have a turbocharger and relying on a gold hop is never a good thing crafting an R-301 isn’t a good option. There are plenty of assault rifles on the ground and you would rather use your crafting materials for something more useful like Shields, batteries, or even craft banners.
When it comes to picking an Assault Rifles for Conduit then it is 100% up to you which one you do want to use and which one you are more comfortable with. The Nemesis is the strongest option on conduit because it does have a high amount of damage but also once you get amped up, it’s like a fully automatic assault Rifle. Some players don’t prefer burst weapons, so flatline is also a good option.
You can also run R-99 on Conduit because R-99 is the king of SMGs and an SMG fits her playstyle perfectly. SMGs give you a little bit more flexibility in the close-range fights because you don’t have to be right next to someone, you can have a little more flexibility, you can be a little bit further away, and you can play certain angles that normally would not be able to play with shotguns.
Ranking Conduit in Meta
As far as ranking Conduit in a team environment then she’s definitely a S-tier. She has way too much Mobility and defensive abilities, and Shield in most cases is very important. She may not be seen as much in ALGS because of the continued standoffs. In Solo queue, she provides a ton of extra defensive and offensive abilities to help you win the game.
I will say that while playing Conduit in both solo queue and Masters and in lower rank lobbies it just became very challenging to get the maximum benefits out of her Shield because teammates simply just don’t understand this Legend entirely.
Final thoughts about Conduit
Conduit is a support Legend. Typically, support Legends are in the backline, holding things down for their team. They either provide cover fire for their entry in secondary fragger or create an area so that they can come back and heal if they get cracked or something like that happens. Conduit does do that, but she is also a little more aggressive than other support legends.
She needs to be within tactical range in order to help her teammates. With the speed boost, she is a little bit slipperier than most supports in fights, so she can play a little bit more aggressively than other supports.
Wrapping It Up
Thank you for reading my guide. I hope you dominate every game with Conduit! You can check out our Apex Legends Badge Boost service, where we can unlock any badge for you with Conduit.
Also, we keep on uploading new content on our blog section, make sure you check it out to stay updated in Apex Legends. Cheers.